Sticky Sweet Chili Chicken Thighs Recipe | Flavorful Dinner
Here’s how I made my favorite Sticky Sweet Chili Chicken Thighs recipe — and let me tell you, it was love at first bite. The smell that filled my kitchen was mouthwatering: sweet, garlicky, and just the right hint of spice. As the glaze bubbled and caramelized in the oven, I couldn’t wait to dig in.
When I finally did, the crispy edges, juicy meat, and sticky glaze made every bite unforgettable. If you’re looking for a quick, flavor-packed dinner that feels like takeout but tastes even better, this one’s it.You might also enjoy trying my steak marinade with Worcestershire recipe for another bold, flavor-packed meal idea.

Ingredients
Here’s what you’ll need — each ingredient includes a tip so you understand why it works well:
- 6 boneless, skin-on chicken thighs (using skin-on helps lock in moisture and gives the lovely crispy, caramelized bits).
- 1 Tbsp olive oil (helps sear the chicken and crisp the skin).
- Salt and freshly ground black pepper, to taste (seasoning well ensures the glaze has a great base flavor).
- ⅓ cup sweet chili sauce (this is the star of the glaze — gives the sticky sweet-spicy flavor).
- 2 Tbsp honey (adds extra adhesive sweetness and helps caramelize).
- 2 Tbsp low-sodium soy sauce (adds depth and umami to balance the sweetness).
- 1 Tbsp rice vinegar (a little acidity keeps the glaze from being too heavy).
- 2 cloves garlic, minced (fresh garlic gives flavor that pre-minced just can’t match).
- 1 Tbsp fresh ginger, grated (or 1 tsp ground ginger, but fresh is better for brightness).
- 1 tsp sesame oil (a little sesame oil at the end adds that subtle nutty aroma).
- Sesame seeds & chopped green onions, for garnish (for texture, color, and crunch).
Note: Makes several servings.
Variations
Want to tweak it? Here are alternate options and add-ins I like:
- Dairy-free: This recipe is already dairy-free, so you’re good to go as is.
- Sugar-reduced: Replace the honey with a sugar-free syrup (like monk-fruit or stevia blend) and reduce the sweet chili sauce accordingly.
- Extra heat: Add 1 tsp of sriracha or cayenne pepper to the glaze for a real kick.
- Herb or citrus boost: Stir in a dash of lime juice before serving, or add chopped fresh coriander (cilantro) on top for freshness.
- Vegetarian/vegan twist: Swap the chicken thighs for thick tofu slabs or cauliflower steaks, then follow the same glaze method and bake until caramelized.
If you’re into trying other flavorful marinades, this steak marinade for tacos recipe is another must-try for your next dinner night.
Cooking Time
- Prep Time: 10 minutes
- Cooking Time: 20–25 minutes
- Total Time: 30–35 minutes
Equipment You Need
- Oven-safe skillet or baking sheet (for searing/baking the chicken).
- Mixing bowl (to whisk together the glaze ingredients).
- Measuring spoons & cups (to get the quantities right).
- Pastry brush or spoon (to coat the chicken with glaze).
- Meat thermometer (optional, but helps ensure internal temp is 165 °F/74 °C).
How to Make Sticky Sweet Chili Chicken Thighs
Step 1: Prepare the chicken
I start by patting the thighs dry (this helps the skin crisp). Then I season both sides with salt and pepper. I heat the olive oil in my oven-safe skillet, sear the thighs skin-side down until golden (about 6–8 minutes), flip, and sear for another 2–3 minutes.
Step 2: Mix the glaze
While the chicken is searing, I whisk together the sweet chili sauce, honey, soy sauce, rice vinegar, minced garlic, grated ginger, and sesame oil. This glossy mixture becomes the sticky outer coat that defines the dish.
Step 3: Bake and glaze
Once the chicken is seared, I pour about half of the glaze over the thighs, ensuring each piece is coated. I then transfer the skillet to a preheated oven at around 400 °F (200 °C) and bake for 20–25 minutes, basting halfway with the remaining glaze until it’s bubbling and caramelized.
Step 4: Finish & serve
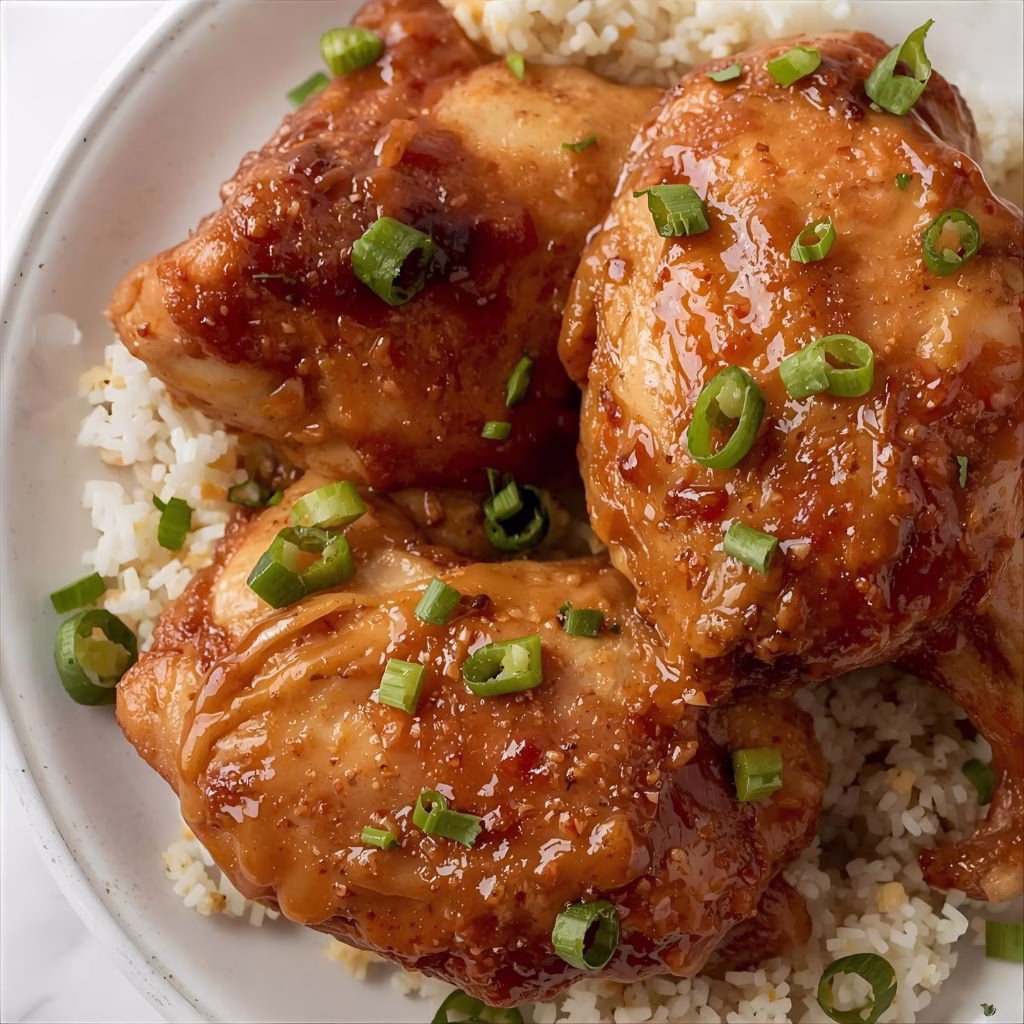
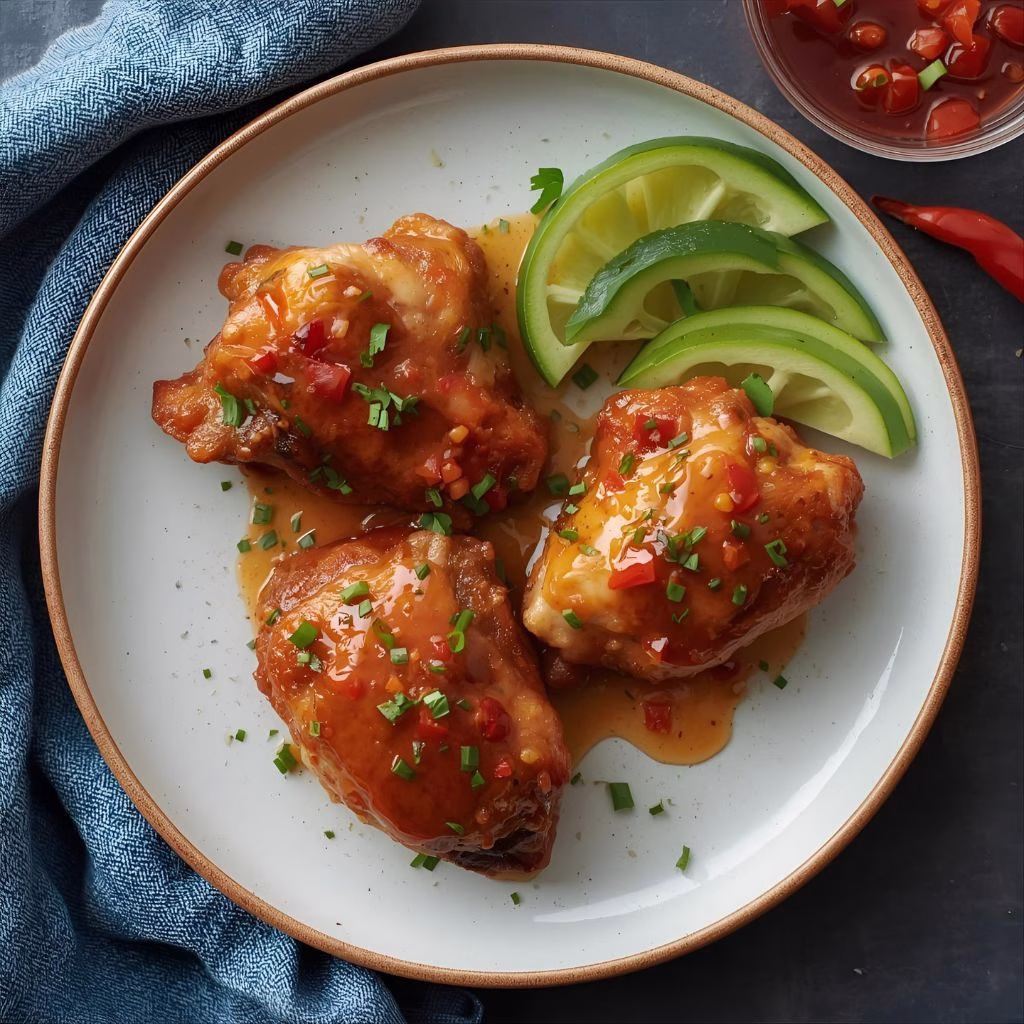
When the thighs are cooked through (internal temp 165 °F/74 °C), I remove them and let them rest for a few minutes—this lets the juices settle. Then I sprinkle sesame seeds and chopped green onions on top and serve immediately.
Additional Tips for Making this Recipe Better
Here are some tweaks I discovered that really improved the dish for me:
- I always let the glaze thicken slightly in a small pan for a minute before coating—it makes the sauce more clingy and glossy.
- I used a wire rack on the baking sheet so air circulates under the chicken and the skin stays crisp rather than soggy.
- I reserve a little raw glaze (just a teaspoon) and brush it right at the end under the broiler for a deeper caramelized finish.
- I always test one thigh for doneness before removing the whole batch—better safe than dried-out chicken.
- I serve immediately out of the oven; if I wait too long, the sauce starts to set and loses some of its shine and stick.
How to Serve Sticky Sweet Chili Chicken Thighs
This dish is not just about flavor—it’s about presentation too. I like to serve the chicken on a bed of steamed jasmine rice (so the sticky sauce gets absorbed). On the side, I add crisp sautéed green beans or broccoli for color contrast. Garnish with lime wedges, a sprinkle of sesame seeds, and a few green onion rings for freshness. You might also use a dark plate so the glossy glaze visually “pops.”
Nutritional Information
Here’s a rough breakdown per serving:
- Calories: ~350–450 kcal (depending on the size of thighs and amount of glaze)
- Protein: ~25–30 g
- Carbohydrates: ~20–30 g
- Fat: ~15–20 g
Make Ahead and Storage
Storage (Refrigerator): After cooking and cooling, store the chicken in an airtight container in the fridge for up to 3 days. The sauce stays lovely but note the skin will soften a bit. You can crisp it again lightly under a broiler.
Freezing: Freeze cooked thighs (glazed) for up to 2 months. Thaw overnight in the refrigerator and reheat in a 350 °F oven until warmed through.
Reheating: To reheat, I recommend using the oven (not microwave)—place on a baking sheet, cover loosely with foil for 5–7 minutes, then uncover and broil for 1–2 minutes to reactivate the sticky outer glaze and crisp the edges.
Why You’ll Love This Recipe
Here are the main reasons I keep coming back to it:
- It’s easy to prepare — minimal ingredients, straightforward steps, and under 35 minutes from start to finish.
- The flavor is bold and versatile — sweet, sticky, slightly spicy, rich with soy umami, and totally satisfying.
- It uses chicken thighs — the darker meat handles the high heat and sticky glaze better, staying juicy rather than drying out.
- You can customize it easily — adjust heat level, reduce sugar, swap protein, or change sides to fit your dietary style.
- It looks share-worthy — glossy caramelized chicken that glistens on the plate, garnished simply yet beautifully with sesame seeds and green onions.
I hope you enjoy making this recipe as much as I did — the sticky coating, aromatic ginger-garlic glaze, and tender chicken thighs really make it feel like a special dinner, even on a regular weeknight. Let me know if you try it and how your version turns out!
Sticky Sweet Chili Chicken Thighs Recipe
Ingredients
Method
- I start by patting the thighs dry (this helps the skin crisp). Then I season both sides with salt and pepper. I heat the olive oil in my oven-safe skillet, sear the thighs skin-side down until golden (about 6–8 minutes), flip, and sear for another 2–3 minutes.
- While the chicken is searing, I whisk together the sweet chili sauce, honey, soy sauce, rice vinegar, minced garlic, grated ginger, and sesame oil. This glossy mixture becomes the sticky outer coat that defines the dish.
- Once the chicken is seared, I pour about half of the glaze over the thighs, ensuring each piece is coated. I then transfer the skillet to a preheated oven at around 400 °F (200 °C) and bake for 20–25 minutes, basting halfway with the remaining glaze until it’s bubbling and caramelized.
- When the thighs are cooked through (internal temp 165 °F/74 °C), I remove them and let them rest for a few minutes—this lets the juices settle. Then I sprinkle sesame seeds and chopped green onions on top and serve immediately.
Notes
- I always let the glaze thicken slightly in a small pan for a minute before coating—it makes the sauce more clingy and glossy.
- I used a wire rack on the baking sheet so air circulates under the chicken and the skin stays crisp rather than soggy.
- I reserve a little raw glaze (just a teaspoon) and brush it right at the end under the broiler for a deeper caramelized finish.
- I always test one thigh for doneness before removing the whole batch—better safe than dried-out chicken.
- I serve immediately out of the oven; if I wait too long, the sauce starts to set and loses some of its shine and stick.