Start by placing your large pot over medium heat and adding the butter. Allow it to melt completely, creating a smooth base for your marshmallows.
Once melted, add all marshmallows and stir continuously until they transform into a smooth, creamy mixture. This process takes about 5-7 minutes and requires constant attention to prevent burning.
Remove the pot from heat immediately once marshmallows are melted. Pour in all 4 cups of Fruity Pebbles cereal at once and stir vigorously until every colorful piece is completely coated.
The mixture should look like a rainbow explosion with each piece glistening with marshmallow coating. Work quickly during this step as the mixture begins to firm up as it cools.
Allow the cereal mixture to cool for about 5-10 minutes until it's comfortable to handle but still pliable. Meanwhile, lay out your fruit roll-ups on a clean surface, smoothing out any wrinkles. Once cooled, take portions of the mixture and shape them into rectangles that match the width of your fruit roll-ups.
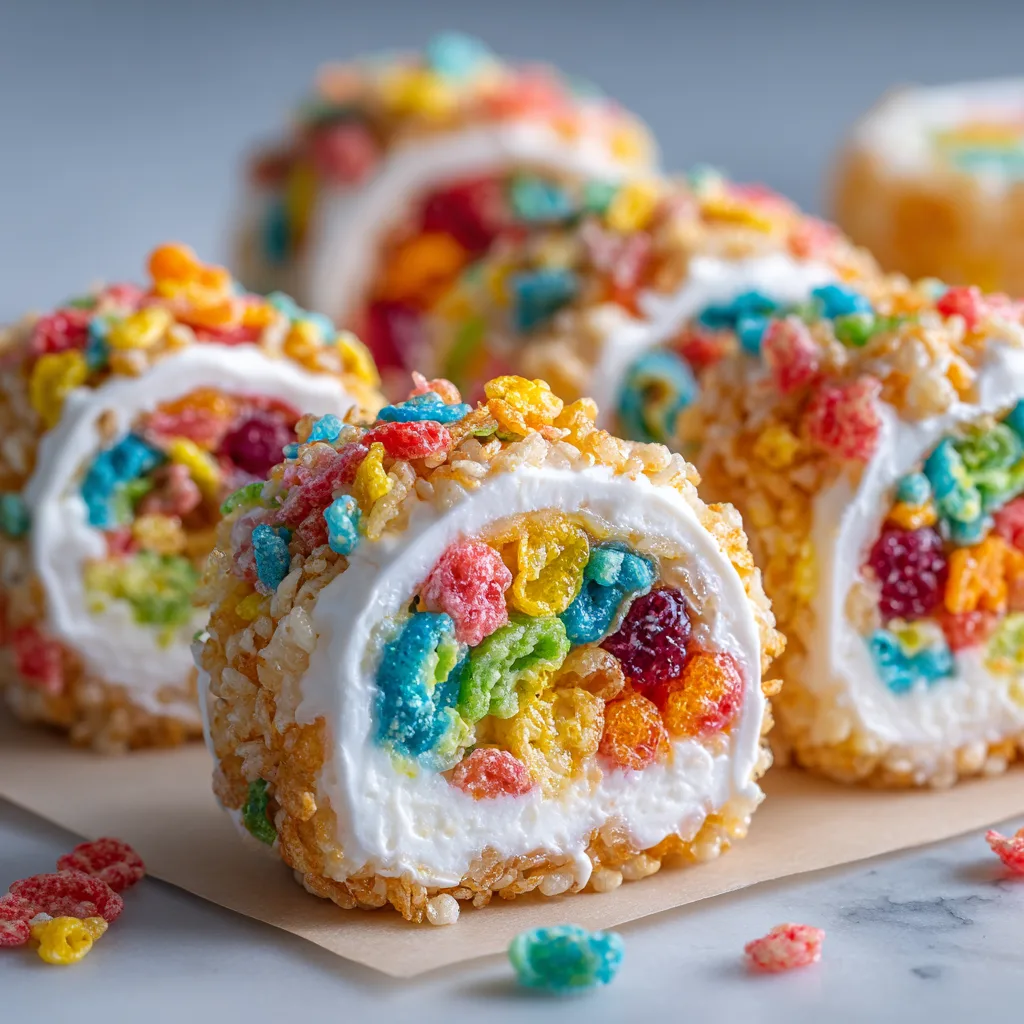
Place one banana at the edge of each cereal rectangle, positioning it so it will be centered when rolled. The banana acts as your "fish" filling, providing a creamy contrast to the crunchy exterior. Make sure the banana is positioned straight to ensure even slices later.
Carefully roll each cereal rectangle around the banana, using the fruit roll-up to wrap and seal the entire creation. Apply gentle pressure while rolling to ensure everything stays together. The fruit roll-up should stick naturally, but you can press the seams gently to secure them.
Using a sharp knife, slice each roll into bite-sized pieces, approximately 1-inch thick. Clean your knife between cuts to prevent sticking and ensure clean edges. Each roll should yield about 6-8 perfect sushi pieces depending on the size of your bananas.
If desired, drizzle chocolate syrup over the finished pieces in decorative patterns. This optional step adds visual appeal and an extra layer of sweetness. Arrange your colorful sushi pieces on a serving platter and prepare to watch faces light up with delight.