Go Back
Christmas Shortbread Cookies Recipe
Ben Carraoli

Christmas Shortbread Cookies Recipe

I pulled out my rolling pin and got the dough ready—it felt just like holiday magic in the kitchen! I love how simple ingredients come together into something festive and buttery. After baking these cookies, I found myself sneaking them straight from the tray (just one more!). Decorating them became a fun little tradition
Prep Time 45 minutes
Cook Time 12 minutes

Ingredients
  

  • 8  ounces 2 sticks butter, very soft — real butter gives that rich, melt‑in‑your‑mouth texture.
  • ½  cup powdered sugar — this dissolves smoothly and adds sweetness without grittiness.
  • 1  teaspoon vanilla extract — adds a warm familiar flavour that complements the butter.
  • 1 ¾  cups all‑purpose flour — the main structure of the cookie.
  • ¼  cup cornstarch — this little trick helps keep crisp edges and prevents spreading.
  • 2  cups powdered sugar — creates a smooth bright icing surface.
  • 4  tablespoons half‑and‑half or milk — thins the icing to the right consistency.
  • ¼ ‑1 teaspoon peppermint extract — gives that festive minty flavour.
  • 1  tablespoon very soft butter — to make the piping smooth and creamy.
  • 1  cup powdered sugar — sweet and easy to pipe.
  • 1 ‑2 tablespoons half‑and‑half or milk — for the right consistency.
  • ½  teaspoon peppermint extract — to echo that minty glaze.
  • 3 ‑4 drops green food colouring — to pipe the little “Christmas tree” squiggles.

Method
 

  1. I started by placing the very soft butter in a bowl and stirring it until smooth. Then I added the powdered sugar and vanilla, mixing by hand until fluffy. After that I incorporated the flour and cornstarch until the dough came together.
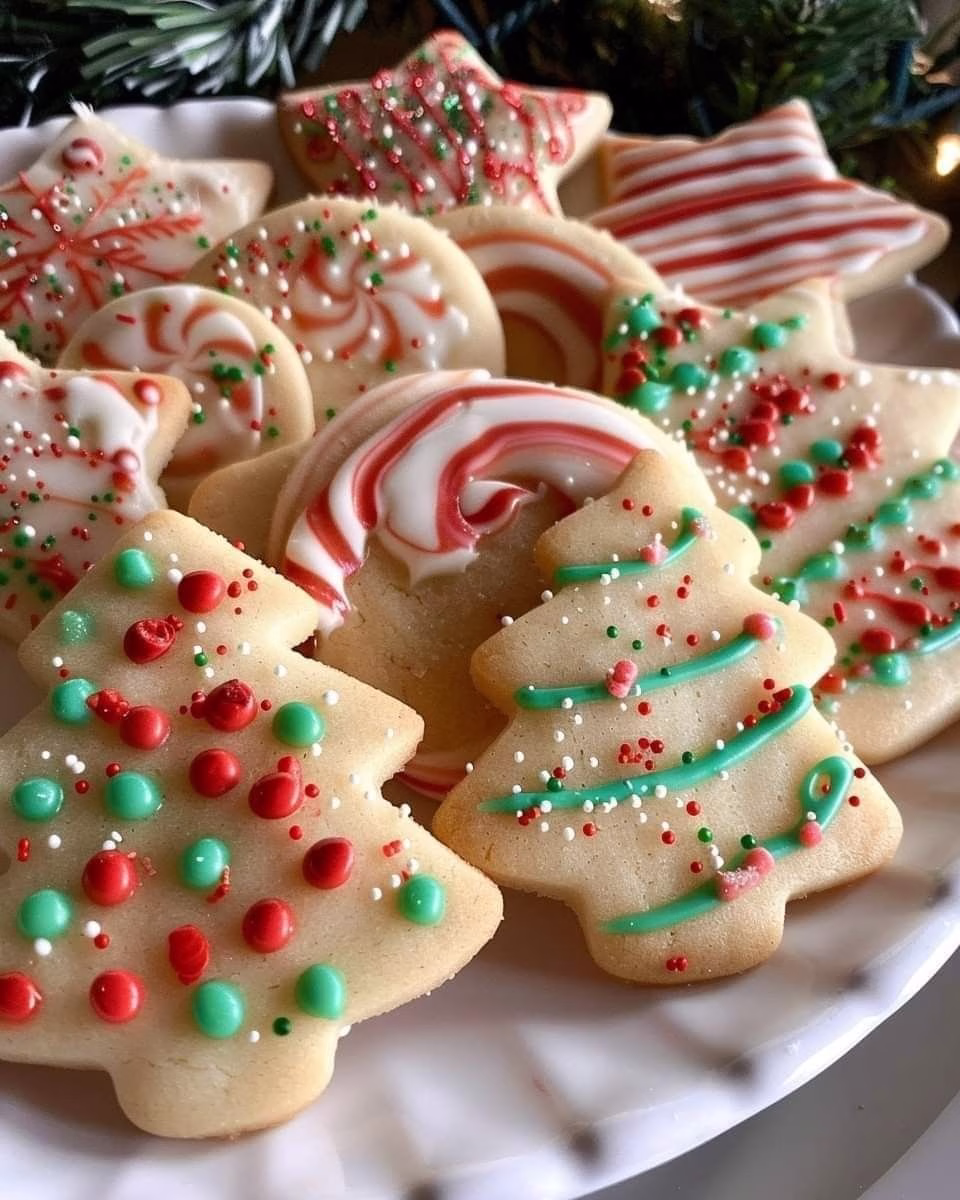
  2. Next I turned out the dough onto a lightly floured surface, formed a ball and flattened it into a disk. Then I rolled it to roughly ⅜‑inch thickness (a helper tip: use adjustable rolling rings) and used cookie cutters for festive shapes. I transferred the shapes to sheet pans, then chilled them in the refrigerator for at least one hour so that they keep their shape when baking.
  3. Preheat your oven (about 350 °F / 175 °C) and bake the chilled cut‑outs for about 12‑14 minutes until the edges just begin to turn golden. Then let them cool completely on a wire rack. While they were cooling, I prepared the glaze and buttercream piping. I dipped the cookies top‑side down into the glaze (letting excess drip), flipped them, then used a piping bag to draw little green tree squiggles and added sprinkles (nonpareils) for extra charm.

Notes

  • I made sure the butter was very soft before mixing (even popped it in the microwave at 10% power for 20‑30 seconds) — it made mixing easier and the dough smoother.
  • I rolled the dough to a consistent thickness (~⅜‑inch) using guides on my rolling pin — this helped cookies bake evenly and look uniform.
  • I chilled the cookie dough cut‑outs well before baking — this kept the cookies from spreading and ensured crisp, well‑defined shapes.
  • I decorated in stages: first dipped the cookies into glaze, then once dry I went back for piping and sprinkles — it made the process less messy and the designs cleaner.
  • I stored the decorated cookies in layers separated by parchment to prevent smudging — especially helpful if gifting them.