I have to tell you, making this Italian Easter Cookies Recipe—also known as Uncinetti—was such a fun and rewarding experience. The aroma of lemon and fresh-baked dough filled my kitchen and instantly made me feel festive.
These cookies are charmingly simple, lightly sweet, and perfect for pairing with coffee or tea. I loved how easy the dough was to handle, and decorating them with a lemon glaze added that extra touch of joy.
If you’re looking to bring a little Italian tradition to your Easter celebrations, I can’t recommend these enough. You can also enjoy similar treats like Cucumber and Heirloom Tomato Salad with Red Onions Recipe alongside your cookies for a refreshing contrast.

Ingredients for Italian Easter Cookies
I like to use fresh, high-quality ingredients whenever possible to get the best flavor. Here’s what you’ll need:
- 1½ cups + 2 tablespoons all-purpose flour (200 grams) – I find that sifting the flour first keeps the dough light and smooth.
- 3¼ tablespoons granulated sugar – balances the citrus glaze beautifully.
- 1 teaspoon baking powder – ensures the cookies have a delicate rise without being cakey.
- 1 pinch of salt – enhances all the flavors, especially if using unsalted butter.
- Zest of one lemon – gives the cookies that bright, springtime flavor.
- 1 large egg – acts as the glue for the dough and gives richness.
- ¼ cup butter, melted and cooled – I recommend using real butter, as it adds the perfect flavor; unsalted works fine if you add a touch more salt.
- 4 tablespoons milk (2% or whole) – keeps the dough moist and easy to shape.
Note: several servings
Lemon Glaze
- 1½–2 cups powdered sugar – use sifted sugar for a smooth glaze.
- 1 tablespoon lemon juice – freshly squeezed adds the best zing.
- 1 tablespoon milk – adjust for thickness.
Variations
I love experimenting with different flavors and dietary options. Here are some ideas:
- Dairy-free: Swap butter with coconut oil or a plant-based margarine.
- Sugar-free: Use a granulated sugar substitute or erythritol for the dough and glaze.
- Flavor-enhancing add-ins: Try almond extract, orange zest, or finely chopped candied fruit for a unique twist. You might also enjoy a sweet treat like Brown Butter Matcha Cookies Recipe for an extra indulgence alongside your Easter spread.

Cooking Time
Here’s the timeline for making these delicious cookies:
- Prep Time: 10 minutes – easy and quick to mix the dough.
- Cooking Time: 15 minutes – bake until lightly golden.
- Total Time: 25 minutes – from start to finish, including glazing.
Equipment You Need
These tools make the process smooth and stress-free:
- Large mixing bowl – for combining all your ingredients.
- Whisk or fork – to mix the dry ingredients and then incorporate wet ingredients.
- Baking sheet – for even baking of cookies.
- Parchment paper – prevents sticking and makes cleanup easier.
- Small bowl – for mixing the lemon glaze.
How to Make Italian Easter Cookies Recipe
I love how straightforward this recipe is. The step-by-step process makes it perfect for both beginner and experienced bakers.
Preparing the Dough
In a large bowl, I whisk together the flour, sugar, baking powder, salt, and lemon zest. Then I make a small well in the center and add the egg, melted butter, and milk. Mixing with a fork until it’s almost combined, I transfer the dough to a flat surface and gently knead until smooth.
Shaping the Cookies
I divide the dough into small portions and roll them into thin ropes about 5–6 inches long. For the traditional look, I tie each rope into a knot. If the ropes are small, I sometimes join two ends to form little circles—it makes them look extra festive.
Baking the Cookies
I place the shaped dough on a parchment-lined baking sheet and bake at 300°F (150°C) for 15–18 minutes or until lightly golden. The smell alone is enough to make you excited for the glaze!
Making the Lemon Glaze
While the cookies cool, I mix powdered sugar, lemon juice, and milk in a small bowl. I adjust the milk until I reach a smooth, pourable consistency. Drizzling it over the cooled cookies gives them a shiny, sweet finish.
Adding Final Touches
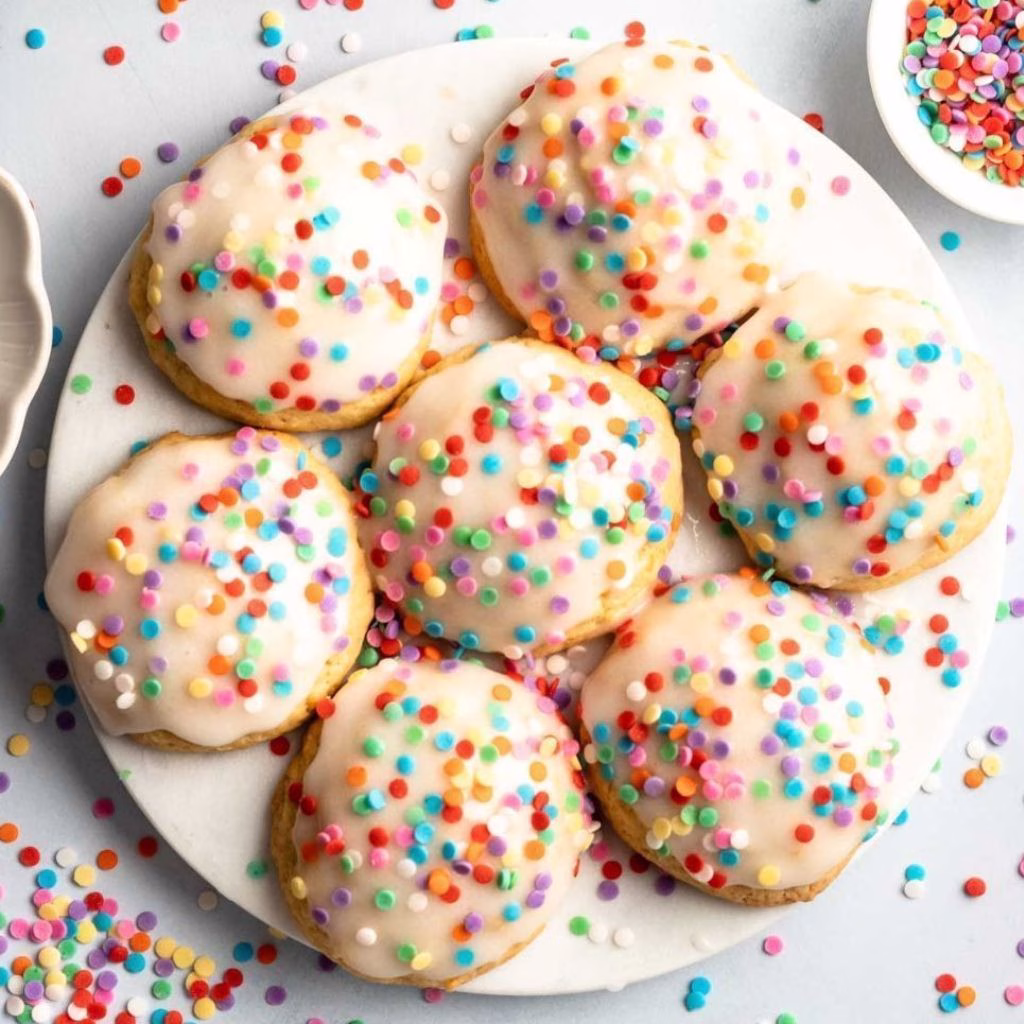
Once glazed, I let the cookies set for a few minutes. For extra charm, I sometimes sprinkle pastel-colored decorations on top, perfect for celebrating Easter.
Additional Tips for Making this Recipe Better
Here are some tips I’ve learned after making these cookies several times:
- I always zest the lemon directly over the flour so the oils infuse the dough.
- Rolling the dough ropes evenly ensures cookies bake at the same rate.
- If the dough feels sticky, I chill it for 10–15 minutes—it’s much easier to handle.
- For a lighter flavor, I occasionally replace half the butter with light olive oil.
- I let the cookies cool completely before glazing; otherwise, the icing melts too much.
How to Serve Italian Easter Cookies
Serving these cookies is part of the fun! I like to:
- Arrange them on a pastel-colored platter for a festive look.
- Drizzle extra glaze for visual appeal and sweetness.
- Pair with coffee, tea, or even a chilled glass of milk for a complete experience.
- Add edible flowers or small sprinkles for a springtime touch.
Nutritional Information
Here’s a quick look at the nutrition per cookie, which I find helpful for portion planning:
- Calories: 76 kcal – a light, not-too-sweet treat.
- Protein: 2 g – a small amount to complement your morning coffee.
- Carbohydrates: 9 g – just enough to satisfy a sweet tooth.
- Fat: 3 g – from butter, providing richness and flavor.
Make Ahead and Storage
These cookies are convenient to prepare in advance.
Storage
I store them in an airtight container at room temperature, and they stay fresh for up to one week.
Freezing
The dough freezes well in a sealed bag or container for up to three months. I simply thaw before shaping and baking.
Reheating
If I want a warm cookie, I pop them in a 300°F oven for 5 minutes. The glaze stays intact and the cookies taste freshly baked.
Why You’ll Love This Recipe
I think you’ll fall for these Italian Easter Cookies for several reasons:
- Simple to Make: The dough comes together quickly, even for a beginner baker.
- Delightfully Light Flavor: The lemon glaze is sweet but not overpowering.
- Versatile: You can adjust flavors, shapes, and toppings to suit any occasion.
- Tradition and Charm: Bringing a little Italian Easter custom to your table makes it special.
- Perfect Pairing: Enjoy with coffee, tea, or as part of a festive brunch spread.
These cookies aren’t just delicious—they’re a conversation starter and a piece of Italian heritage that I’ve come to love baking every Easter. I guarantee they’ll make your holiday table look and taste amazing.
Italian Easter Cookies Recipe
Ingredients
Method
- In a large bowl, I whisk together the flour, sugar, baking powder, salt, and lemon zest. Then I make a small well in the center and add the egg, melted butter, and milk. Mixing with a fork until it’s almost combined, I transfer the dough to a flat surface and gently knead until smooth.
- I divide the dough into small portions and roll them into thin ropes about 5–6 inches long. For the traditional look, I tie each rope into a knot. If the ropes are small, I sometimes join two ends to form little circles—it makes them look extra festive.
- I place the shaped dough on a parchment-lined baking sheet and bake at 300°F (150°C) for 15–18 minutes or until lightly golden. The smell alone is enough to make you excited for the glaze!
- While the cookies cool, I mix powdered sugar, lemon juice, and milk in a small bowl. I adjust the milk until I reach a smooth, pourable consistency. Drizzling it over the cooled cookies gives them a shiny, sweet finish.
- Once glazed, I let the cookies set for a few minutes. For extra charm, I sometimes sprinkle pastel-colored decorations on top, perfect for celebrating Easter.
Notes
- I always zest the lemon directly over the flour so the oils infuse the dough.
- Rolling the dough ropes evenly ensures cookies bake at the same rate.
- If the dough feels sticky, I chill it for 10–15 minutes—it’s much easier to handle.
- For a lighter flavor, I occasionally replace half the butter with light olive oil.
- I let the cookies cool completely before glazing; otherwise, the icing melts too much.