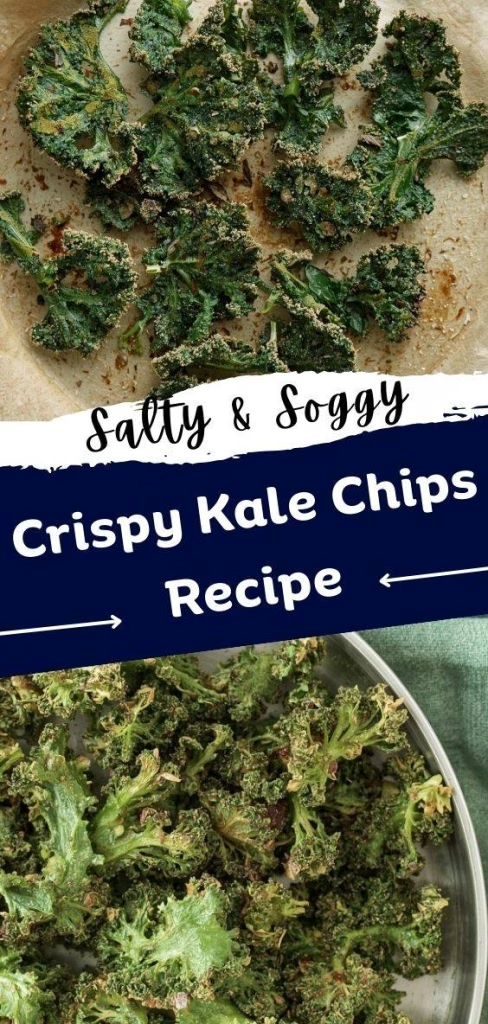
I have to tell you, making Crispy Kale Chips Recipe at home has completely changed my snack game. I used to buy store-bought versions that were either too salty or soggy, but after trying this recipe, I realized how simple and fun it is to make them yourself. The best part is that they’re light, crunchy, and full of flavor without any guilt.
Every time I bake a batch, my kitchen smells amazing, and I can’t resist tasting a few straight from the oven. This recipe has become my go-to for a healthy, crispy snack anytime I crave something crunchy. You can also enjoy The Best Creamiest Baked Mashed Potatoes Recipe alongside these chips for a comforting snack combo.
Ingredients
Here’s what you’ll need to make the perfect crispy kale chips:
- 1 head kale, washed and thoroughly dried – Fresh kale works best; avoid wet leaves to prevent sogginess.
- 2 tablespoons olive oil – I use extra virgin olive oil for richer flavor, but any mild oil works.
- Sea salt, for sprinkling – Enhances flavor without overpowering the natural taste of kale.
Note: several servings
Variations
If you like to switch things up, you can try these variations:
- Dairy-free: Keep the recipe as is; no dairy needed.
- Flavor boosts: Add garlic powder, smoked paprika, or nutritional yeast for a cheesy taste.
- Spicy kick: Sprinkle a little cayenne pepper or chili flakes before baking. This pairs surprisingly well if you serve it with Crispy Buffalo Chicken Recipe for a fun, flavorful snack platter.
- Sweet twist: Toss with a touch of maple syrup and cinnamon for a unique treat.
Cooking Time
Here’s the time you’ll need for this recipe:
- Prep Time: 25 minutes
- Cooking Time: 20 minutes
- Total Time: 45 minutes
Equipment You Need
- Baking sheet – To evenly spread kale for crisping.
- Mixing bowl – For tossing kale with olive oil and seasonings.
- Oven – Essential for baking the chips to perfection.
- Tongs or spatula – To turn the leaves halfway for even crispiness.
How to Make Crispy Kale Chips Recipe
Step 1: Preheat the oven
Preheat your oven to 275°F. This lower temperature ensures the kale chips dry out and crisp up without burning. I always double-check my oven temperature to keep them evenly crispy.
Step 2: Prepare the kale
Remove the tough ribs from the kale and tear the leaves into roughly 1 1/2-inch pieces. I like to handle them gently so the leaves don’t tear too much, keeping them in nice bite-sized portions.
Step 3: Toss with oil and salt
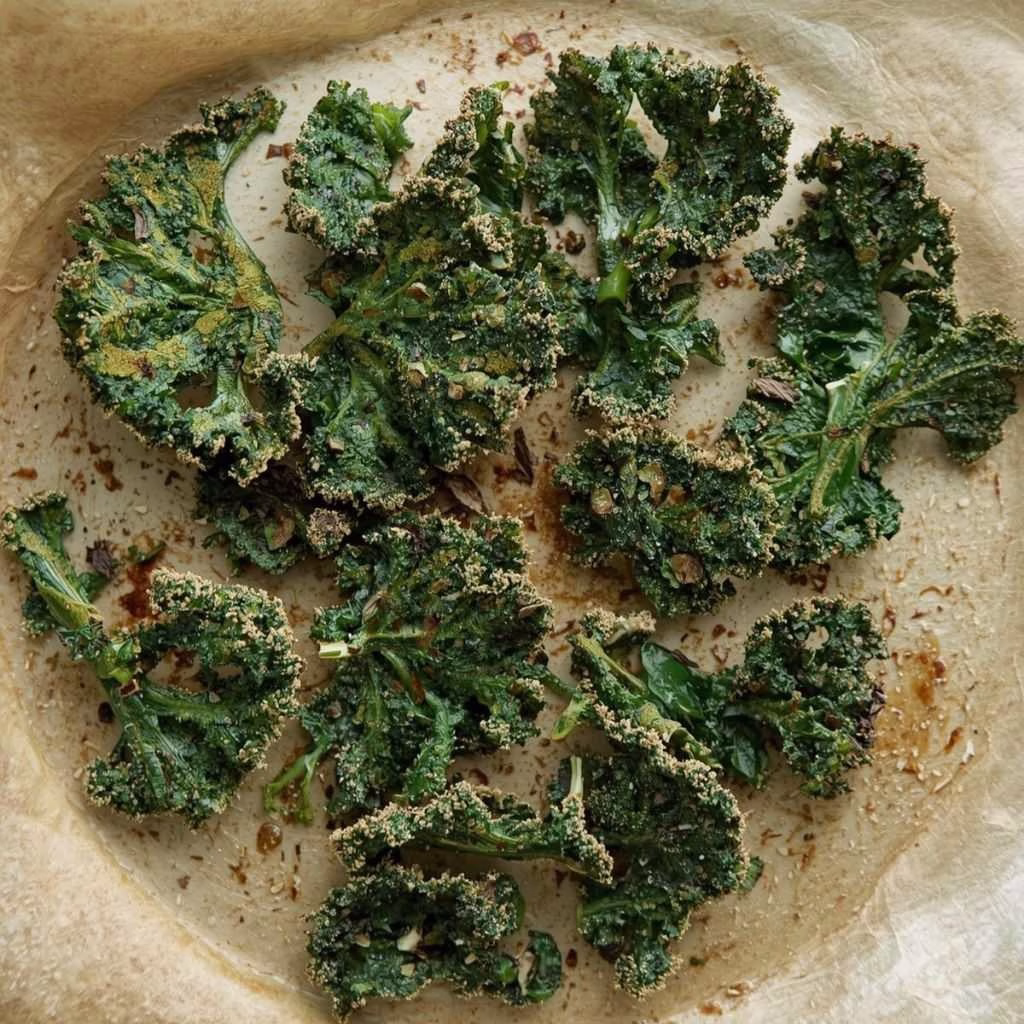
Place the kale in a mixing bowl, drizzle with olive oil, and sprinkle lightly with sea salt. Use your hands to massage the oil into each leaf so every piece is lightly coated for even crisping.
Step 4: Arrange on a baking sheet
Spread the kale leaves in a single layer on a baking sheet. Overlapping can cause some chips to steam instead of crisp. I always use two sheets if needed to avoid crowding.
Step 5: Bake the kale
Bake for about 20 minutes, turning the leaves halfway through with tongs or a spatula. I keep an eye on them during the last few minutes to prevent burning while ensuring they stay crisp.
Step 6: Cool and serve
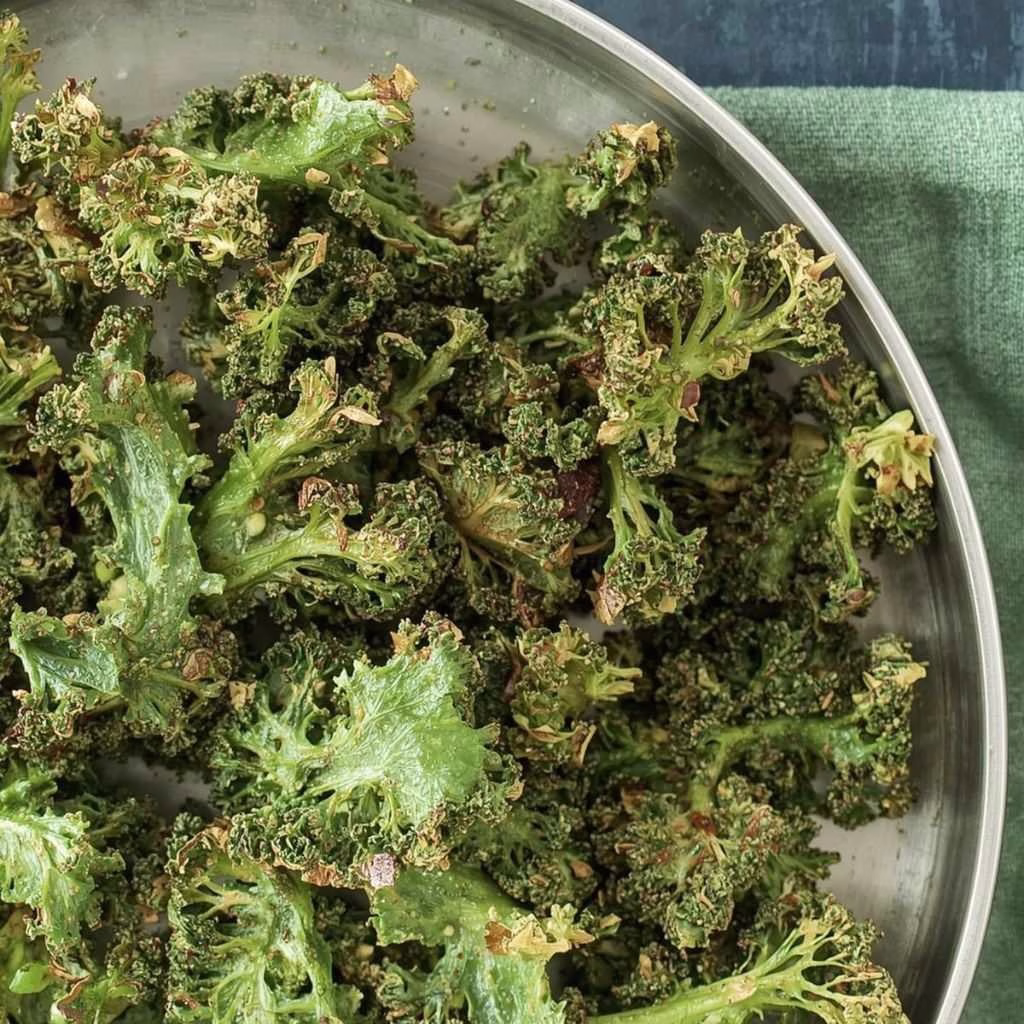
Once baked, let the kale chips cool slightly on the sheet. They crisp up even more as they cool. I usually enjoy a few immediately while still warm—they’re irresistible!
Additional Tips for Making this Recipe Better
From my experience, a few tweaks make these kale chips even more delicious:
- I always pat the kale completely dry after washing; wet leaves never crisp well.
- Tossing the leaves by hand ensures each one is coated evenly with oil and salt.
- Don’t skip turning the leaves halfway; it prevents burnt edges and uneven cooking.
- For extra crunch, I sometimes leave the oven door slightly ajar during the last few minutes.
- I recommend serving immediately, but see storage tips below if you want to save leftovers.
How to Serve Crispy Kale Chips Recipe
Serving these kale chips is fun because they look so vibrant. I like to place them in a small bowl lined with parchment paper for a casual snack. For gatherings, sprinkle with extra sea salt or a dash of paprika to make them visually appealing. They pair perfectly with dips like hummus, guacamole, or even a light yogurt-based dip.
Nutritional Information
Here’s a quick look at the nutrition for one serving:
- Calories: 93 – A light and guilt-free snack.
- Protein: 2 grams – Adds a small protein boost.
- Carbohydrates: 7 grams – Mostly from the natural kale fibers.
- Fat: 7 grams – Healthy fats from olive oil for flavor and crunch.
Make Ahead and Storage
- Storing: Keep leftover kale chips in an airtight container at room temperature for up to 2 days. This prevents moisture from making them soggy.
- Freezing: Kale chips don’t freeze well due to their crisp texture. It’s best to make small batches fresh.
- Reheating: If chips lose crispness, a quick 3-5 minute bake at 250°F restores their crunch. I’ve done this when making large batches for parties, and it works perfectly.
Why You’ll Love This Recipe
Here’s why I keep coming back to this snack:
- Easy to prepare – Only three ingredients and simple steps make it stress-free.
- Versatile – Perfect for a healthy snack, party appetizer, or side dish.
- Customizable flavors – You can spice, sweeten, or flavor to suit your taste.
- Healthy option – Low calorie, packed with nutrients, and guilt-free.
- Crunchy and satisfying – Offers the perfect bite without processed ingredients.
These crispy kale chips are hands-down my favorite snack when I want something light, flavorful, and wholesome. They’re simple enough for a weekday treat yet versatile for parties or gatherings. Once you try them, you’ll never reach for store-bought chips again!
Crispy Kale Chips Recipe
Ingredients
Method
- Preheat your oven to 275°F. This lower temperature ensures the kale chips dry out and crisp up without burning. I always double-check my oven temperature to keep them evenly crispy.
- Remove the tough ribs from the kale and tear the leaves into roughly 1 1/2-inch pieces. I like to handle them gently so the leaves don’t tear too much, keeping them in nice bite-sized portions.
- Place the kale in a mixing bowl, drizzle with olive oil, and sprinkle lightly with sea salt. Use your hands to massage the oil into each leaf so every piece is lightly coated for even crisping.
- Spread the kale leaves in a single layer on a baking sheet. Overlapping can cause some chips to steam instead of crisp. I always use two sheets if needed to avoid crowding.
- Bake for about 20 minutes, turning the leaves halfway through with tongs or a spatula. I keep an eye on them during the last few minutes to prevent burning while ensuring they stay crisp.
- Once baked, let the kale chips cool slightly on the sheet. They crisp up even more as they cool. I usually enjoy a few immediately while still warm—they’re irresistible!
Notes
- I always pat the kale completely dry after washing; wet leaves never crisp well.
- Tossing the leaves by hand ensures each one is coated evenly with oil and salt.
- Don’t skip turning the leaves halfway; it prevents burnt edges and uneven cooking.
- For extra crunch, I sometimes leave the oven door slightly ajar during the last few minutes.
- I recommend serving immediately, but see storage tips below if you want to save leftovers.