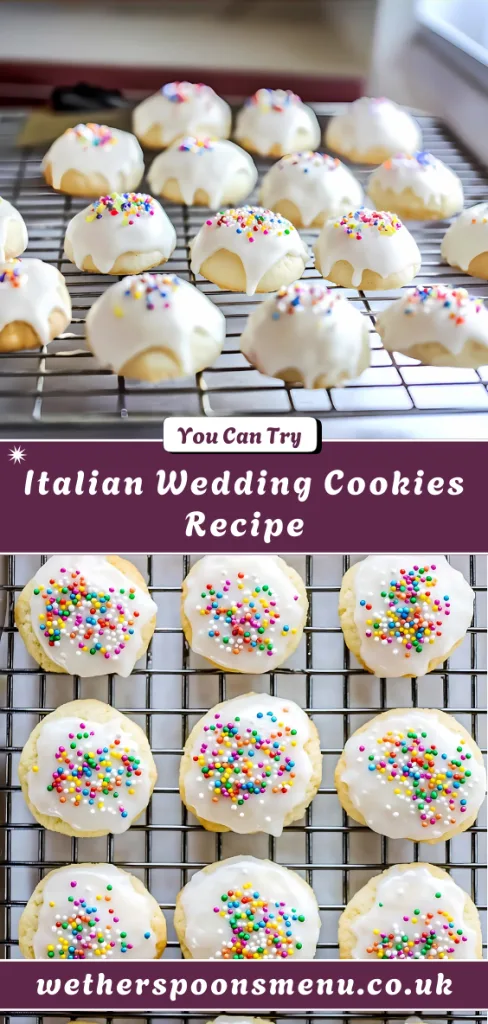
The Best Italian Wedding Cookies (Anginetti) Recipe
I just finished baking a batch of these incredible Italian Wedding Cookies recipe, and my kitchen smells heavenly! They are so soft, delicate, and just sweet enough. These little treats, also known as Anginetti, remind me of celebrations and family gatherings.
They are surprisingly simple to whip up with basic ingredients. After mastering these, I think I’ll explore our guide for a Buffalo Chicken Nuggets Recipe next. For now, let’s get into these delightful cookies.
Additional Tips for Making this Recipe Better
Having made these cookies a few times, I’ve picked up a few tricks that really elevate them.
- Don’t skip the chilling step. I know it’s tempting to bake them right away, but chilling the dough is the secret to getting those perfectly domed, non-spreading cookies.
- Use cooking spray on your hands. The dough is very sticky. I found that lightly spraying my hands with non-stick cooking spray made rolling the balls of dough much easier and less messy.
- Get the glaze consistency right. The perfect glaze should be thick enough to coat the cookie but thin enough to drizzle smoothly. If it’s too thick, add milk by the half-teaspoon. If it’s too thin, add more powdered sugar.
- Let them cool completely. You must wait until the cookies are fully cooled before glazing. If you frost them while they’re still warm, the glaze will melt and slide right off.
Variations to Try
One of the best things about this recipe is its versatility. You can easily adapt it to suit your tastes or dietary needs.
- Citrus Twist: Add the zest of one lemon or orange to the cookie dough and use lemon or orange juice instead of milk in the glaze for a bright, citrusy flavor.
- Dairy-Free Option: Substitute the unsalted butter with a high-quality dairy-free butter alternative and use plant-based milk (like almond or oat milk) for the glaze.
- Nutty Addition: For extra texture and flavor, mix in a half-cup of finely chopped nuts, such as almonds or walnuts, into the dough.
- Sugar-Free Version: You can replace the sugar with a granular sweetener substitute and use a powdered sugar alternative for the glaze.
For more ideas, you can explore our collection of other dinner recipes.
Equipment You Need
You don’t need any fancy gadgets to make these cookies, just some basic baking tools.
- Mixing bowls: For combining your wet and dry ingredients separately.
- Electric mixer: Helps to properly cream the butter and sugar for a light, fluffy texture.
- Measuring cups and spoons: For accurate measurement of all ingredients.
- Baking sheet: A standard cookie sheet is perfect for baking these treats.
- Parchment paper: Prevents the cookies from sticking and makes for easy cleanup.
- Cookie scoop: Ensures your cookies are uniform in size, so they bake evenly.
How to Serve Italian Wedding Cookies Recipe
These cookies are beautiful on their own, but a little extra attention to presentation makes them even more special.
- Arrange them on a tiered platter for an elegant display at parties or gatherings.
- Serve them alongside a cup of espresso or coffee for a classic Italian pairing.
- For a dessert platter, present them with other small treats. They would look lovely next to something like our Honey Lime Basil Peach Salad Recipe.
- Package them in a decorative box or tin tied with a ribbon for a thoughtful, homemade gift.
Calories Count
Nutritional information is an estimate and can vary based on the specific ingredients used.
- Calories: 95 kcal
- Carbohydrates: 15g
- Protein: 1g
- Fat: 3g
- Saturated Fat: 2g
- Cholesterol: 20mg
- Sodium: 45mg
- Sugar: 9g
How to Store the Cookies
Proper storage will keep your cookies fresh and delicious for days.
- Allow the cookies to cool and the glaze to set completely before storing. Place them in an airtight container at room temperature, where they will stay fresh for up to five days.
- For longer storage, you can freeze the unfrosted cookies. Place them in a freezer-safe bag or container, and they will keep for up to three months. Thaw at room temperature before glazing and serving.
Why You’ll Love This Recipe
There are so many reasons to fall in love with these delightful cookies.
- Simple and Accessible: The recipe uses common pantry staples and is very easy for bakers of all skill levels to follow.
- Perfectly Soft Texture: These cookies are light, cakey, and melt in your mouth.
- Customizable Flavor: You can easily switch between almond, anise, lemon, or vanilla extract to create your favorite flavor profile.
- Festive and Beautiful: The glaze and sprinkles make them a beautiful addition to any holiday cookie platter or celebration.
More About Anginetti
These cookies have a rich history in Italian culture, particularly in the southern regions. While they are called “wedding cookies,” they are not exclusively for weddings. They are a staple at all kinds of celebrations, including holidays, baptisms, and family get-togethers.
The name “Anginetti” comes from the Italian word for “little angels,” which perfectly describes their light and delicate nature. Every family seems to have its own slightly different version of the recipe, passed down through generations, making it a true taste of home for many.
Italian Wedding Cookies Recipe
Ingredients
Method
- First, grab a small bowl and combine your all-purpose flour, baking powder, and salt. Whisk them together to ensure everything is evenly distributed. This simple step prevents pockets of baking powder or salt in your finished cookies. Set this bowl aside for now.
- In a larger mixing bowl, use an electric mixer on medium speed to cream the softened butter and sugar. Continue mixing for about two minutes until the mixture is light and fluffy. Then, add the eggs one at a time, beating well after each addition. Finally, mix in your choice of almond or anise extract.
- Now it’s time to bring it all together. Gradually add the dry ingredient mixture to your wet ingredients. Mix on low speed just until the flour is incorporated. Be careful not to overmix, as this can lead to tough cookies. The dough will be quite sticky at this point, which is completely normal.
- Using a tablespoon or a small cookie scoop, roll the dough into balls about one inch in size. Place them on a baking sheet lined with parchment paper, leaving some space between each one. Refrigerate the tray of cookie dough balls for at least one hour. This step is crucial for helping the cookies hold their shape while baking.
- Preheat your oven to 350°F (175°C). Place the chilled cookies in the oven and bake for 10–12 minutes. You’ll know they are done when they are just set and the bottoms are a very light golden brown. Let them cool on the baking sheet for a few minutes before transferring them to a wire rack to cool completely.
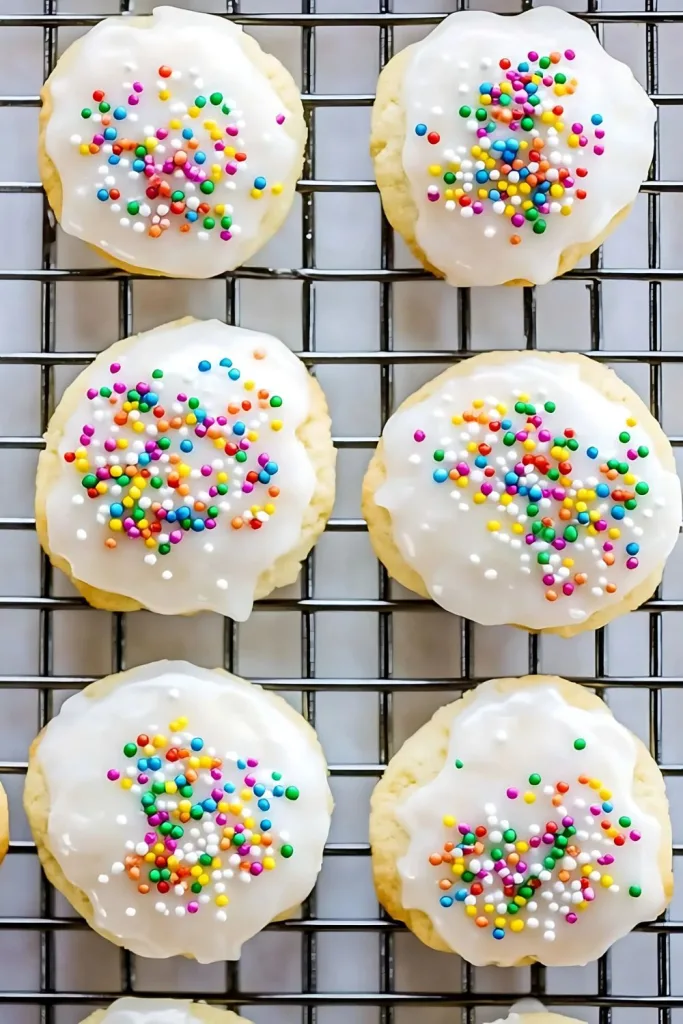
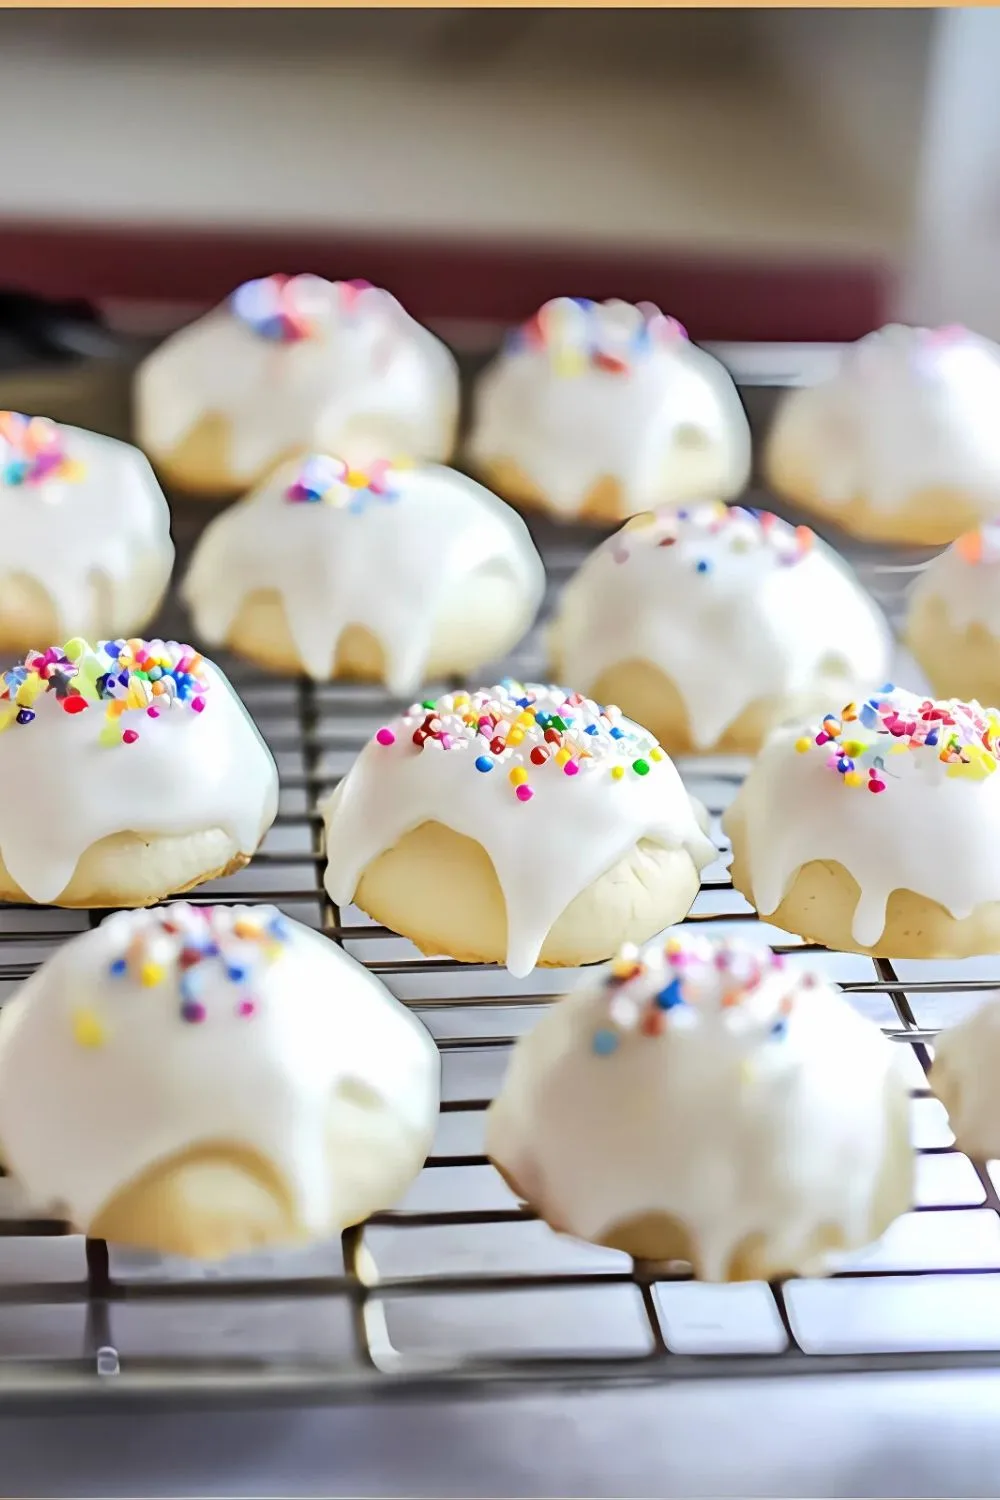
- While the cookies cool, prepare the frosting. In a small bowl, whisk together the powdered sugar, milk, and extract. Add the milk one tablespoon at a time until you have a thick but pourable glaze. Once the cookies are completely cool, you can either dip the tops in the glaze or drizzle it over them. Immediately add the rainbow sprinkles while the frosting is still wet.