Coke Float: A Refreshing Twist You’ll Love
When I first made this coconut coke float, I honestly didn’t expect it to turn out so good. I always loved the idea of soda floats but never found one I enjoyed—until now. Root beer floats were too strong for me, but coke with creamy coconut ice cream hit the perfect balance.
The texture was smooth, the fizz was fun, and the taste was pure summer in a glass. If you enjoy experimenting with treats like the Pink Lemonade Pie, this float will give you the same satisfying homemade joy.
Additional Tips for Making This Recipe Better
After trying this recipe myself, here are some personal tips that made it even more delicious:
- Freeze the coconut mixture in smaller containers for quicker blending.
- Add a splash of vanilla extract to the ice cream for extra flavor.
- Chill your serving glasses before assembling for a frosty finish.
- Don’t skip blending long enough—patience turns chalky bits into smooth cream.
- Garnish with a cherry or mint leaf for a café-style presentation.
Fun Variations to Try
Want to change things up? This float is flexible and easy to customize.
- Use almond milk instead of coconut milk for a nutty flavor.
- Replace Coke Life with diet coke or flavored soda for fewer calories.
- Try honey or maple syrup instead of stevia if you don’t mind natural sugar.
- Add chocolate syrup drizzle for a dessert-like twist.
- Sprinkle shredded coconut or cinnamon on top for added texture.
If you’re a fan of experimenting with dinner recipes, this is just as fun but in a sweet, refreshing version.
Equipment You’ll Need
A few basic tools are enough to get this recipe done:
- Freezer – To set the coconut cream into ice cream.
- Food processor – To blend frozen coconut chunks into smooth texture.
- Mixing bowl – To combine coconut cream with stevia.
- Shallow container – For faster, even freezing.
- Tall serving glasses – To create that perfect float presentation.
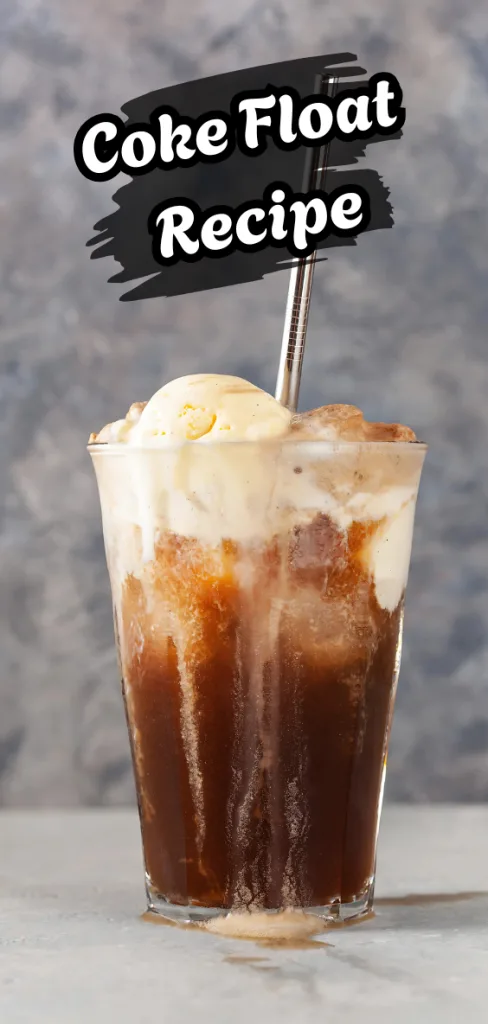
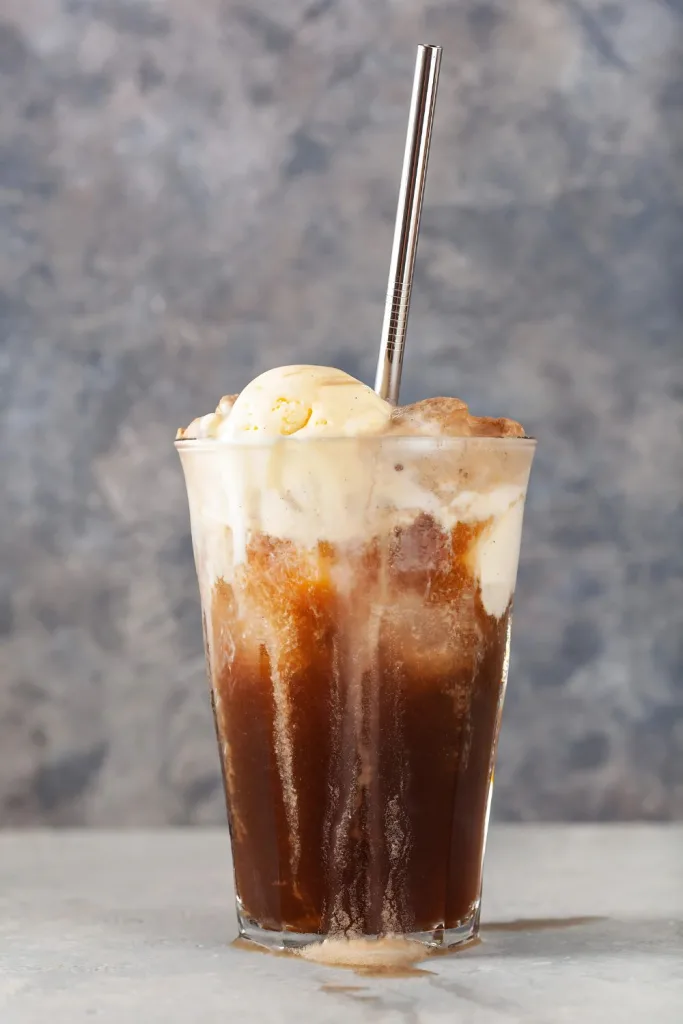
How to Serve Coconut Coke Float?
Serving this float can be as fun as making it. A little creativity makes it even more appealing.
- Use tall, clear glasses so the fizz and ice cream layers show.
- Top with whipped coconut cream for extra indulgence.
- Add a cherry on top for the classic float look.
- Sprinkle cocoa powder or shredded chocolate for a fancy touch.
- Pair it with other desserts like Mango Float for a perfect party spread.
Calories Count
Here’s a quick breakdown of the nutrition in this recipe:
- Coconut milk (400 ml can): ~700 calories
- Stevia: 0 calories
- Coke Life (per 330 ml can): ~100 calories
- Total (whole recipe): ~800 calories
- Per serving: ~200–250 calories (depending on portion size)
How to Store the Coconut Coke Float
Since this recipe uses homemade ice cream, here’s how to store it:
- Restoring: If your coconut ice cream becomes too hard in the freezer, let it sit at room temperature for 10 minutes before blending or scooping.
- Freezing: Store leftover coconut ice cream in an airtight container for up to one week. Avoid refreezing after blending for best texture.
- Reheating: This recipe doesn’t need reheating since it’s served cold. Just blend again if the texture hardens after storage.
Why You’ll Love This Recipe?
This coconut coke float is more than just a drink—it’s a refreshing experience. Here’s why it stands out:
- Easy to make – Just a few ingredients and simple steps. No fancy tools needed.
- Customizable – Works with different sweeteners, sodas, and add-ins.
- Dairy-free option – Perfect for those avoiding traditional ice cream.
- Fun and nostalgic – Brings back childhood float memories with a healthier twist.
- Party-friendly – Great for summer gatherings, kids’ treats, or just a personal indulgence.

Coke Float
Ingredients
Method
- Open the coconut milk can and loosely strain it so that the thicker cream separates from the liquid. This creamy part will give the ice cream its rich texture. Discard or save the leftover liquid for smoothies. Transfer the coconut cream to a bowl and stir in the stevia until fully mixed.
- Pour the sweetened coconut cream into a shallow container for even freezing. Place it in the freezer for about 3–5 hours, or until firm. Using a shallow container helps the mixture freeze faster and makes it easier to break into chunks later. Avoid freezing overnight, as it may become too hard.
- Once frozen, break the coconut mixture into pieces and transfer them into a food processor. At first, it will look chalky and crumbly, but keep blending. After a few minutes, the texture will transform into smooth, creamy ice cream that resembles dairy-based versions.
- To serve, pour cold Coke Life into a tall glass. Add a few scoops of your homemade coconut ice cream on top. The fizz will rise and mix with the cream, creating a frothy and delicious float. You can also scoop the ice cream into the glass first and then pour the coke over it for more fizz. Serve immediately with a spoon and straw.