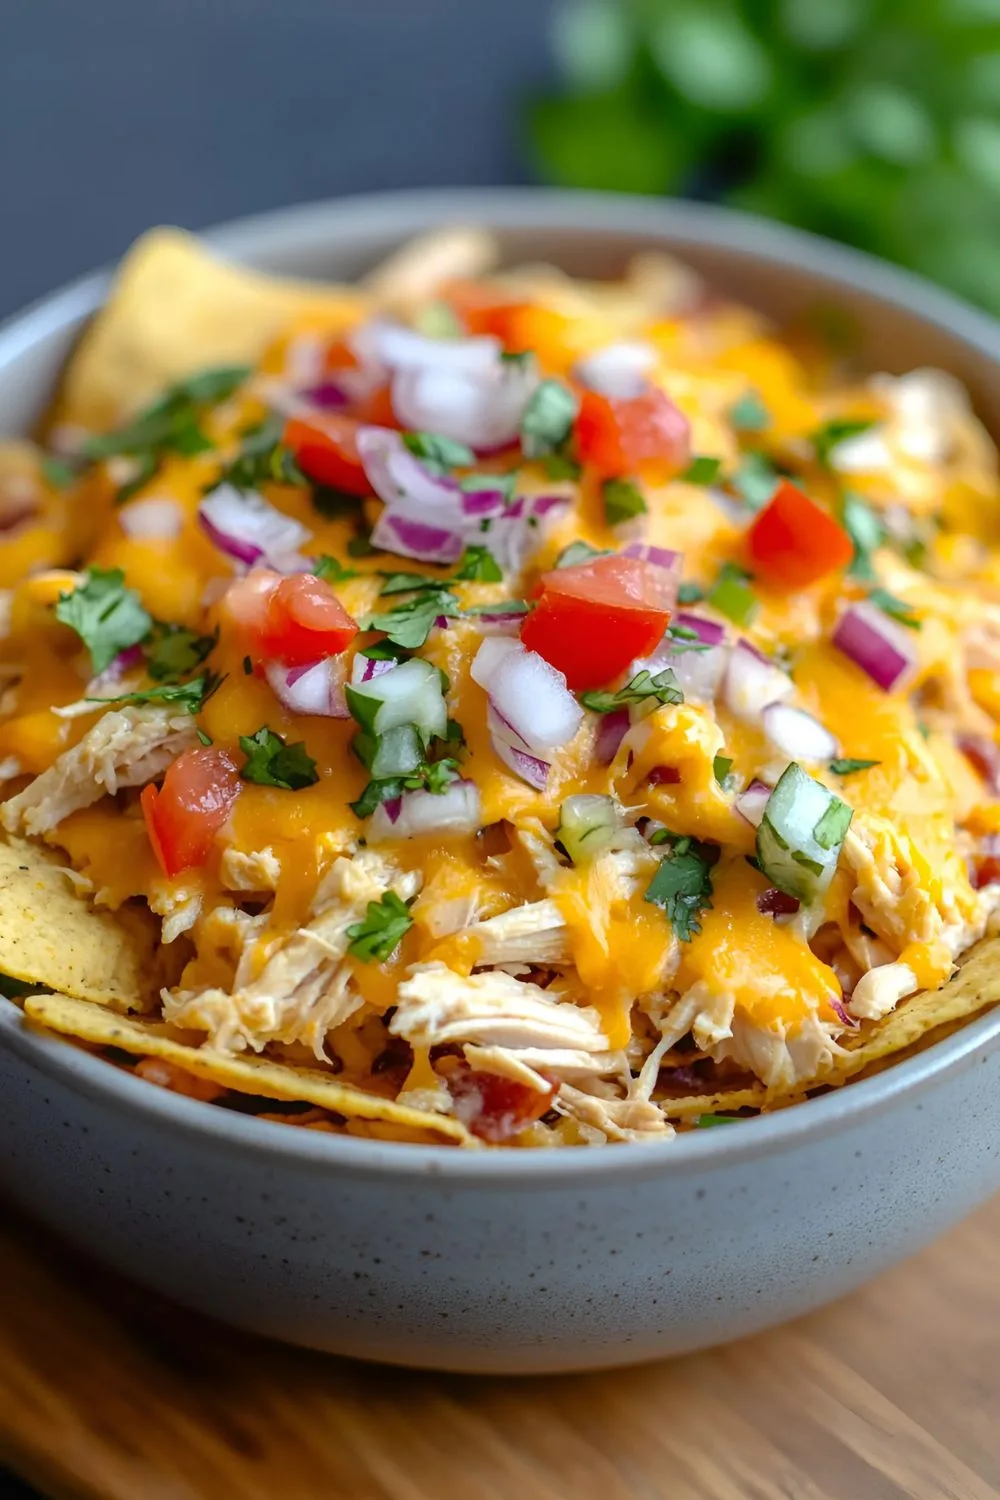
Easy Rotisserie Chicken Nachos Recipe – Cheesy, Flavorful & Crowd-Pleaser
I have to admit—I can’t go more than a couple of weeks without making these rotisserie chicken nachos. The cheesy, savory layers with crunchy tortilla chips are pure comfort food, and it’s so much fun pulling everything together.
The best part? It’s quick to prep and always gets rave reviews from family and friends. Whether you need something for a game day gathering or just want to treat yourself to a flavorful meal, you’ll absolutely love how easy and delicious this recipe is!
You can explore a tasty Rotisserie Chicken Crescent Roll Recipe here.

Ingredients for Rotisserie Chicken Nachos Recipe
Here are some ingredients for rotisserie chicken nachos.
For the nachos:
- 1 rotisserie chicken (about 4 pounds), shredded
- 1 13-ounce bag of restaurant-style tortilla chips
- 1 15-ounce can of refried black beans (or regular refried beans)
- 2 cups shredded sharp cheddar cheese
- 2 cups shredded pepper jack cheese
- 2 tablespoons chopped fresh cilantro (for garnish)
- 2 tablespoons diced red onion (for garnish)
For the salsa:
- 2 tablespoons olive oil
- 1 cup diced onion
- 1 large jalapeño, stemmed, seeded, and minced
- 1 tablespoon minced garlic
- ¼ cup chopped fresh cilantro
- 1 15-ounce can of diced tomatoes (with juice)
- ½ teaspoon ground cumin
- ½ teaspoon ground coriander
- ½ teaspoon chili powder
Note: This recipe serves 6–8 people.
Variations to Try
You can switch up this recipe in countless ways! Here are some ideas to get creative with your nachos:
- Vegetarian Option: Swap out the chicken for sautéed mushrooms or spiced black beans and corn.
- Spicy Upgrade: Add jalapeños or a drizzle of hot sauce for a fiery kick.
- Low-Carb Nachos: Use baked cheese crisps or pork rinds instead of tortilla chips.
- Extra Creamy: Top with sour cream, avocado slices, or homemade guacamole.
- Gluten-Free Version: Ensure your refried beans and chips are certified gluten-free.
Try our collection of healthy dinner recipes for every day of the week.
Cooking Time
This recipe is incredibly quick to put together, making it ideal for busy nights or last-minute gatherings.
- Prep Time: 20 minutes
- Cooking Time: 10 minutes
- Total Time: 30 minutes
Equipment You Need
Gather these essentials to speed up your prep process and make cooking easy:
- Baking sheet or oven-proof skillet: For layering and baking the nachos.
- Mixing bowls: To prepare the salsa and heat other ingredients.
- Knife and cutting board: For chopping the onion, jalapeño, and other fresh ingredients.
- Spatula: Handy for spreading refried beans and serving the nachos.
- Microwave-safe dishes: For warming the beans and shredded chicken.
How to Make Rotisserie Chicken Nachos?
With vibrant salsa, melty cheese, and tender chicken, these nachos are a real treat. Follow these simple steps for guaranteed success!
Preheat the Oven
Start by preheating your oven to 450°F. This high temperature ensures the cheese melts quickly without overbaking the chips. Meanwhile, prep a baking sheet or skillet by spreading out the tortilla chips in an even layer.
Prepare the Salsa
For a homemade touch, sauté diced onion and minced jalapeño in olive oil over medium heat. Once fragrant and softened, add garlic and cook for another minute or two. Stir in the canned tomatoes, cilantro, cumin, coriander, and chili powder. Simmer the mixture uncovered for 8–10 minutes until it thickens slightly.
Warm the Beans and Chicken
While your salsa cooks, heat the refried beans in a microwave-safe dish. Shred the rotisserie chicken into bite-sized pieces and warm it in the microwave for about 1–2 minutes. This step enhances the flavors and makes layering smoother.
Assemble the Nachos
Begin by adding dollops of warm refried beans over the tortilla chips. Next, layer the prepared salsa, shredded chicken, and both cheeses evenly over the top. Be generous with the cheese so it melts beautifully and binds everything together.
Bake to Perfection
Transfer your nacho assembly into the preheated oven. Bake for around 6–8 minutes, keeping an eye on the cheese as it melts. Once bubbly and golden, remove from the oven and sprinkle fresh cilantro and diced onions as garnish.
Serve Right Away
Nachos are best served immediately to preserve their crunchiness! Offer lime wedges, guacamole, or sour cream on the side for dipping and topping. Trust me, these personal touches go a long way in elevating the experience.

Why You’ll Love This Recipe?
This recipe has something for everyone! Here’s why it’ll quickly become a favorite:
- It’s ready in 30 minutes, making it perfect for busy days.
- The homemade salsa adds a burst of fresh, vibrant flavors.
- Rotisserie chicken keeps it tender, juicy, and easy to prepare.
- Customizable toppings allow you to suit any taste or dietary need.
How to Serve Rotisserie Chicken Nachos?
Presentation is key when serving nachos! Arrange the baked tray directly on the table for a casual vibe, or transfer the nachos to individual plates for a more polished feel.
Fresh toppings like chopped cilantro, creamy guacamole, diced tomatoes, and pickled jalapeños can be served on the side for added choices. Accompany the dish with a side of cold beer or iced lime soda for the ultimate game-day feast.
Try our easy Rotisserie Chicken Enchiladas Recipe for a quick meal.
Nutritional Information
Here’s a quick glance at the nutritional details per serving:
- Calories: 810
- Protein: 61g
- Carbohydrates: 39g
- Fat: 43g
Make Ahead and Storage
If you’re preparing for a party or have leftovers, these tips will help you enjoy your nachos to the fullest.
To make ahead, prep the salsa, shred the chicken, and chop the toppings in advance. Store each component separately in airtight containers in the fridge. When you’re ready to serve, simply assemble and bake.
For storage, note that nachos are best enjoyed fresh since the chips may lose their crispness over time. However, you can refrigerate the leftovers for up to 2 days in an airtight container. Reheat in a 400°F oven or air fryer to restore some of the crunch.
Tips for Making the Recipe
After making these nachos a few times, I have a few handy tips to share for the best results:
- Use high-quality tortilla chips for a sturdy base that won’t crumble under toppings.
- Microwave the chicken and beans before adding them to the nachos for even heat.
- Don’t skimp on the cheese! It’s the glue that holds everything together.
- Layer the ingredients strategically to ensure every bite is flavorful.
- Serve immediately to enjoy the full crunch and cheesy goodness.
What toppings go on chicken nachos?
There’s a world of topping options for chicken nachos! Popular choices include shredded cheese (like cheddar and pepper jack), fresh salsa, guacamole, sour cream, chopped cilantro, diced tomatoes, and sliced jalapeños.
For an extra crunch, add pickled red onions or crumbled tortilla strips. You can even drizzle ranch or hot sauce for a unique twist.
What is the secret to crispy nachos?
Crispiness is key for nachos! To keep your chips from getting soggy, layer them evenly and avoid piling on too many liquid ingredients. Heating the toppings (like beans or chicken) before assembly helps to minimize excess moisture.
Baking at a high temperature (around 450°F) for a short time also ensures the chips stay crispy and the cheese melts perfectly.
These rotisserie chicken nachos are a fun, crowd-pleasing dish that will have everyone coming back for seconds. With easy prep, versatile toppings, and guaranteed deliciousness, it’s hard not to love this recipe. Enjoy experimenting with your favorite add-ins and make it your own!

Rotisserie Chicken Nachos Recipe
Ingredients
Method
- Start by preheating your oven to 450°F. This high temperature ensures the cheese melts quickly without overbaking the chips. Meanwhile, prep a baking sheet or skillet by spreading out the tortilla chips in an even layer.
- For a homemade touch, sauté diced onion and minced jalapeño in olive oil over medium heat. Once fragrant and softened, add garlic and cook for another minute or two. Stir in the canned tomatoes, cilantro, cumin, coriander, and chili powder. Simmer the mixture uncovered for 8–10 minutes until it thickens slightly.
- While your salsa cooks, heat the refried beans in a microwave-safe dish. Shred the rotisserie chicken into bite-sized pieces and warm it in the microwave for about 1–2 minutes. This step enhances the flavors and makes layering smoother.
- Begin by adding dollops of warm refried beans over the tortilla chips. Next, layer the prepared salsa, shredded chicken, and both cheeses evenly over the top. Be generous with the cheese so it melts beautifully and binds everything together.
- Transfer your nacho assembly into the preheated oven. Bake for around 6–8 minutes, keeping an eye on the cheese as it melts. Once bubbly and golden, remove from the oven and sprinkle fresh cilantro and diced onions as garnish.
- Nachos are best served immediately to preserve their crunchiness! Offer lime wedges, guacamole, or sour cream on the side for dipping and topping. Trust me, these personal touches go a long way in elevating the experience.