I still smile thinking about the first time I made this Cupid’s Potion Float Recipe. It was Valentine’s Day, and I wanted something fun and sweet to sip with my family. As soon as I combined pink strawberry soda with creamy vanilla ice cream, I knew this treat was a keeper.
It’s fizzy, frothy, and downright charming in a tall glass. You’ll notice right away how pretty it looks with whipped cream and sprinkles on top! You can also enjoy similar chicken salad recipes for a light treat alongside your float.

Ingredients
Here’s every tasty thing you’ll need to bring this float to life, plus tips to get the best flavor and texture:
- 1 Bottle Strawberry Soda – Pick a bright, fruity soda for the most vivid pink color and effervescence.
- 1 Pint Vanilla Ice Cream – Quality really matters here: creamy ice cream melts just right with the soda fizz. You can pair it with a side of slow-cooker creamy tomato basil chicken recipe for a cozy meal.
- Heavy Cream – For homemade whipped cream; store-bought works, but homemade tastes richer.
- Sugar – Just a touch to sweeten your whipped cream; adjust based on your taste.
- Sprinkles – Choose colorful Valentine’s sprinkles to make it look festive.
- White Chocolate (optional) – Melts beautifully for decorating the glass rim.
- Gummies (optional) – Adds fun texture and extra sweetness if you like!
Note: Several servings (the ingredient amounts make multiple delicious floats).
Variations
Want to tweak this dreamy drink? Try one of these:
- Dairy-Free: Use coconut milk ice cream and whipped coconut cream for a plant-based twist.
- Sugar-Free: Swap standard soda for a sugar-free strawberry version and use low-sugar whipped topping.
- Flavor Boost: Add a splash of cherry juice or real strawberry puree for extra depth.
- Adults Only: A little splash of raspberry liqueur makes this float a romantic cocktail.

Cooking Time
Here’s a quick look at how long it all takes:
- Prep Time: 5 minutes
- Cooking Time: 0 minutes (no actual cooking!)
- Total Time: 5 minutes
Equipment You Need
Below are things that help you make this float easily and beautifully:
- Tall Glass: Holds all the ice cream, soda, and toppings.
- Ice Cream Scoop: Makes even scoops that float perfectly.
- Small Bowl & Whisk: For whipping your cream if doing it from scratch.
- Spoon or Straw: To enjoy your float properly!
How to Make Cupid’s Potion Float: Step-by-Step
Prepare the Glass
Start with a nice tall glass. If you want to decorate the rim, melt your white chocolate and stick sprinkles to the edge before building the float.
Add the Ice Cream
Drop about two generous scoops of vanilla ice cream into the bottom of the glass. Make sure there’s room above for soda and toppings.
Pour the Strawberry Soda
Pour the strawberry soda slowly over the ice cream. It should fizz and rise, but leave enough space at the top for whipped cream.
Build It Up
Add a couple more scoops of ice cream and more soda until the glass is nearly full. This layered look makes the float even more tasty.
Finish With Toppings
Generously dollop your homemade whipped cream over the top, then sprinkle with vibrant sprinkles. Toss on gummies if you love extra fun!
Additional Tips for Making This Recipe Better
Here are a few tricks I learned while making this float that helped make it even more delightful:
- Chill the Glass: I love chilling the glass first because it slows the ice cream from melting too quickly.
- Slow Soda Pouring: Pouring soda gently reduces foam and keeps your layers intact.
- Use Fresh Ingredients: Fresh whipped cream always tastes better than canned — trust me!
- Add Extra Garnish: Little candies or a heart-shaped straw make it feel extra special.
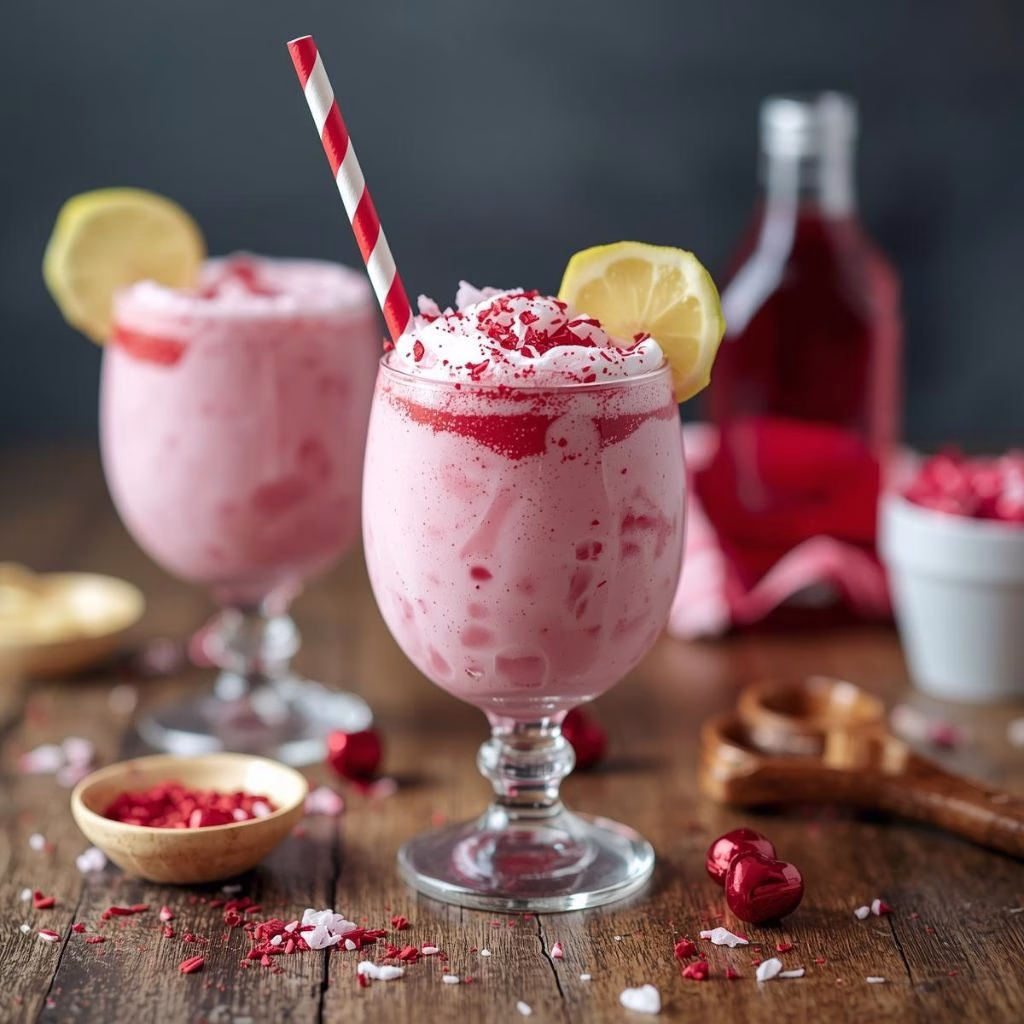
How to Serve Cupid’s Potion Float
This drink is as pretty as it is tasty. Pour it into clear glasses so the pink layers show through. Top with a swirl of whipped cream and finish with a sprinkle of red and pink sprinkles. For special occasions, use fun straws or Valentine’s-themed picks. Serve with a long spoon so everyone can scoop up every frothy layer!

Nutritional Information
Here’s a quick idea of what you’ll be sipping in each serving:
- Calories: Around 480+ per serving (varies with toppings).
- Protein: Around 5 g from the ice cream.
- Carbohydrates: Mostly from soda and sugar — expect sweet goodness.
- Fat: Comes mainly from ice cream and whipped cream.
Make Ahead and Storage
You’ll want to enjoy this float fresh, but here’s how to handle leftovers:
Storing
Place leftover soda and ice cream separately in airtight containers — never mix them ahead of time, or the soda goes flat.
Freezing
You can freeze extra ice cream scoops ahead of time, but don’t freeze the completed float — the carbonation will disappear and texture changes.
Reheating
There’s nothing to reheat here (this is a cold treat!), so just re-chill soda and whip up fresh cream when you’re ready.
Why You’ll Love This Recipe
Here are a few reasons this float has become a favorite of mine:
- It’s super quick to make — just minutes and you’re sipping!
- It’s perfect for celebrations — especially Valentine’s Day.
- You can customize every time with different toppings or sodas.
- It’s fun for all ages — kids and adults alike adore the fizzy sweetness.
- The visual appeal makes it great for sharing on social media!
Cupid’s Potion Float Recipe
Ingredients
Method
- Start with a nice tall glass. If you want to decorate the rim, melt your white chocolate and stick sprinkles to the edge before building the float.
- Drop about two generous scoops of vanilla ice cream into the bottom of the glass. Make sure there’s room above for soda and toppings.
- Pour the strawberry soda slowly over the ice cream. It should fizz and rise, but leave enough space at the top for whipped cream.
- Add a couple more scoops of ice cream and more soda until the glass is nearly full. This layered look makes the float even more tasty.
- Generously dollop your homemade whipped cream over the top, then sprinkle with vibrant sprinkles. Toss on gummies if you love extra fun!
Notes
- Chill the Glass: I love chilling the glass first because it slows the ice cream from melting too quickly.
- Slow Soda Pouring: Pouring soda gently reduces foam and keeps your layers intact.
- Use Fresh Ingredients: Fresh whipped cream always tastes better than canned — trust me!
- Add Extra Garnish: Little candies or a heart-shaped straw make it feel extra special.