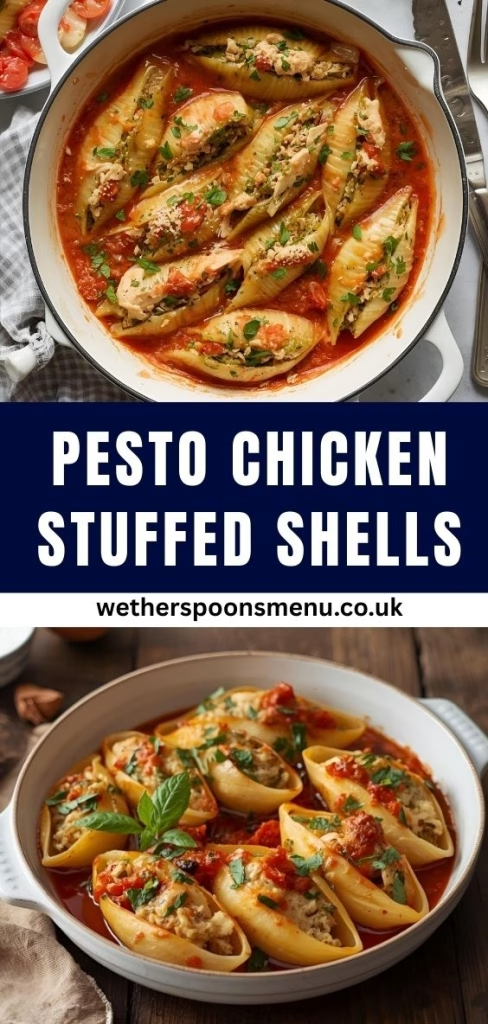
Pesto Chicken Stuffed Shells Recipe | Cheesy & Flavorful
I finally made these Pesto Chicken Stuffed Shells Recipe and wow, what a hit! Warm, cheesy, and packed with flavor, every bite tasted like comfort. The blend of basil pesto, tender chicken, cream cheese, and plenty of mozzarella felt cozy yet elegant. My kitchen smelled heavenly as it baked.
I can’t wait to share the recipe with you — it’s simple, satisfying, and perfect for family dinners. You can also enjoy a hearty Chicken Pot Pie Noodle Skillet Recipe for a cozy meal night.
Ingredients
- 1 box (12 ounces) jumbo pasta shells — these big shells are perfect for stuffing and hold the filling nicely.
- 1 lb cooked, shredded chicken breast (seasoned with salt and pepper) — pre-cooked chicken makes assembly quick and adds protein and texture.
- 1 to 1 ½ containers (7.5 ounces each) chive-and-onion cream cheese — gives the filling a creamy, slightly tangy base; adjust quantity based on how moist you want the mixture.
- 1/3 to 1/2 cup basil pesto (I personally use about 1/3 cup) — brings bright basil flavor and depth; start with less and add more if you like stronger pesto taste.
- 3 cups shredded mozzarella cheese (divided) — mozzarella melts beautifully and creates that gooey, comforting layer on top and inside.
- 1 jar (24 ounces) marinara sauce — adds a rich tomato base that balances the cheesy, creamy filling.
- Freshly chopped parsley (optional) — a light, fresh finishing touch that adds color and a hint of herbiness.
Note: several servings (the recipe yields about 6 to 8 servings, depending on portion size).
Variations
If you want to change things up or adjust for dietary needs, here are some ideas:
- Go vegetarian — skip the chicken and replace with sautéed mushrooms, roasted bell peppers, spinach, or tofu.
- Use a different cheese base — swap chive-and-onion cream cheese with plain cream cheese, ricotta, or part-skim options.
- Dairy-free version — use plant-based cream cheese, dairy-free pesto, and vegan mozzarella.
- Flavor enhancers — add garlic, red pepper flakes, or chopped spinach for extra flavor and texture.
Cooking Time
- Prep Time: ~30 minutes
- Cook Time: ~25 to 30 minutes
- Total Time: ~55–60 minutes
Equipment You Need
- Large pot — to boil the jumbo pasta shells.
- Colander — to drain the cooked shells.
- Medium bowl — to mix the chicken and cheese filling.
- 9×13-inch baking dish — for assembling and baking.
- Oven — to melt the cheese and bring everything together.
How to Make Pesto Chicken Stuffed Shells
Preheat and Prep Shells
Preheat the oven to 350°F. Prepare your baking dish with a light coating of nonstick spray. Cook the jumbo pasta shells until al dente, then drain and rinse under cold water so they stay firm.
Mix the Filling
In a bowl, combine shredded chicken, cream cheese, a portion of the mozzarella, and basil pesto. Stir until everything comes together into a creamy, flavorful mixture that’s easy to spoon into the shells.
Stuff the Shells in the Dish
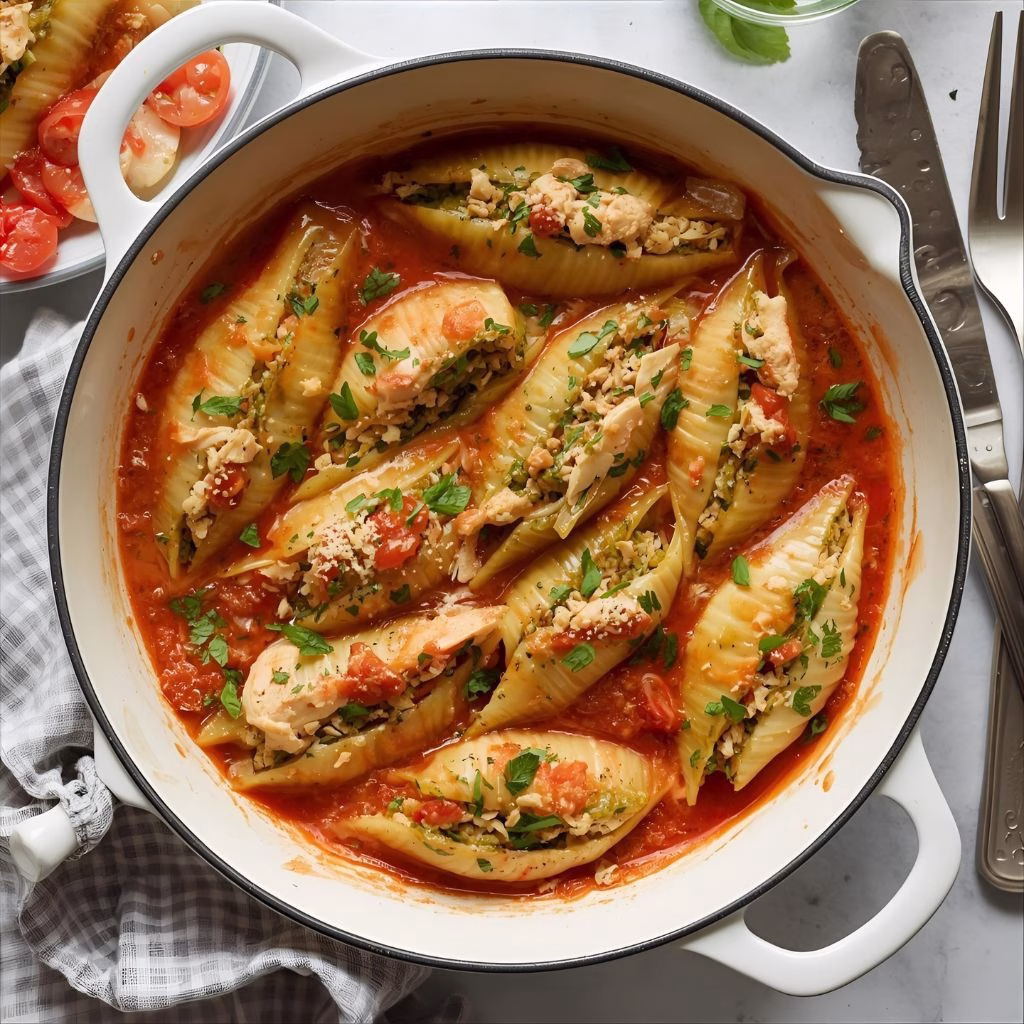
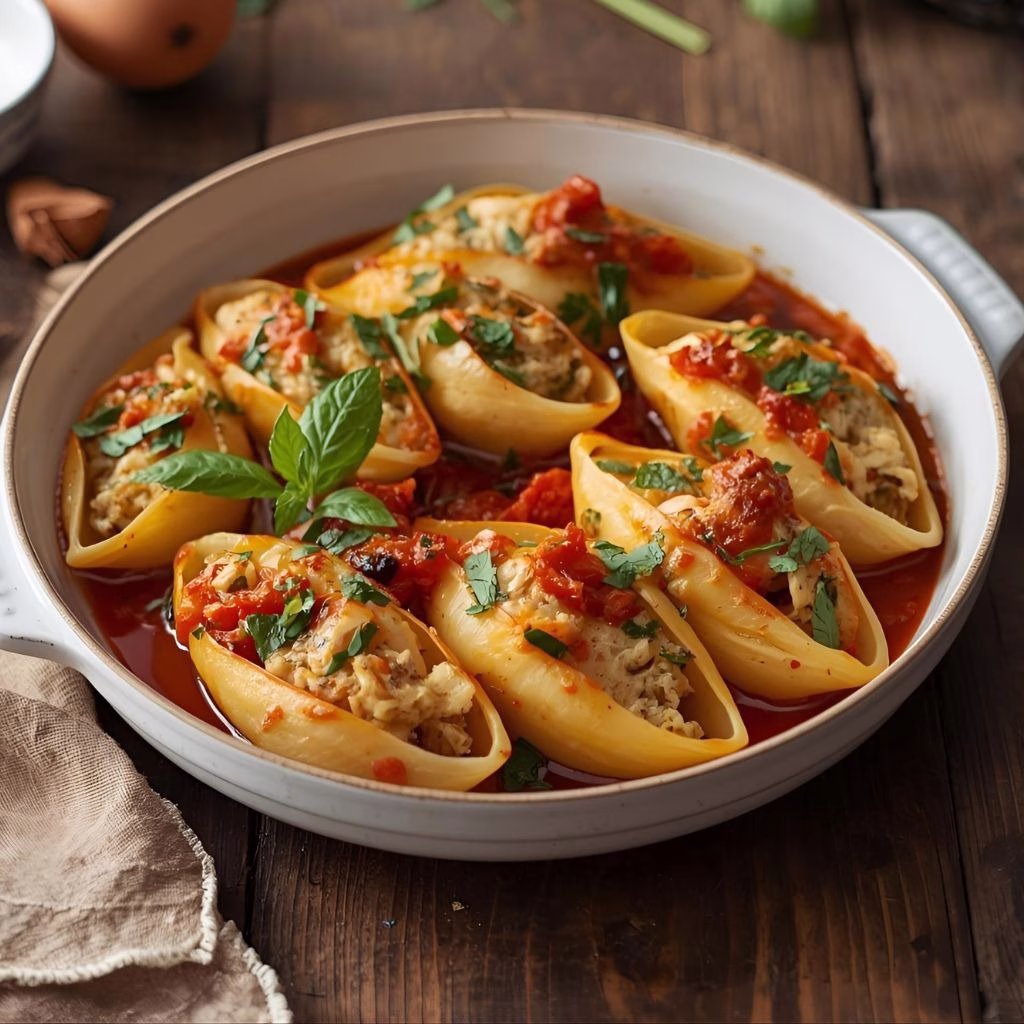
Spread a layer of marinara sauce at the bottom of the baking dish. Fill each shell with a spoonful of the chicken-pesto mixture and arrange them neatly in the sauce.
Add Sauce and Cheese, Then Bake
Pour the remaining marinara sauce over the stuffed shells and sprinkle with the rest of the mozzarella. Bake uncovered for 25–30 minutes until the cheese melts and bubbles beautifully.
Additional Tips for Making This Recipe Better
- I sometimes add extra pesto for a stronger basil punch — it wakes up the flavor.
- I rinse the cooked shells so they stay firm and easy to stuff.
- I let the dish rest 5 minutes after baking — the filling sets and serving becomes easier.
- When I want to save time, I prep the entire dish the night before and bake it the next day.
How to Serve Pesto Chicken Stuffed Shells
Serve these shells warm as a main dish. A crisp green salad, roasted vegetables, or garlic bread works perfectly on the side. For a pretty finish, sprinkle chopped parsley or basil over the top or drizzle a bit of extra pesto for color and freshness.
Nutritional Information
Approximate values per serving:
- Calories: ~550–650
- Protein: ~30–35 g
- Carbohydrates: ~45–55 g
- Fat: ~25–35 g
Make Ahead and Storage
Refrigerating Leftovers
Store cooled leftovers in an airtight container for up to 3 days. Reheat in the oven so the cheese melts again and the texture stays nice.
Freezing (Before Baking)
You can freeze the stuffed shells before baking. Assemble fully, cover tightly, and freeze for up to 1 month. Thaw in the fridge before baking, adding a bit of extra bake time if needed.
Reheating Baked Shells
Reheat in an oven-safe dish until warmed through. This keeps the cheesy texture soft and melty.
Why You’ll Love This Recipe
Here’s why this dish is always a favorite:
- It’s simple to prepare but tastes impressive — great for weeknights and gatherings.
- The flavor combination is incredible: basil pesto, creamy filling, and melty cheese.
- It’s flexible — easy to adapt to dietary needs or add veggies.
- It stores well and works great for meal prep or make-ahead cooking.
- It’s comforting, hearty, and family-friendly — everyone loves it.
Pesto Chicken Stuffed Shells Recipe
Ingredients
Method
- Preheat the oven to 350°F. Prepare your baking dish with a light coating of nonstick spray. Cook the jumbo pasta shells until al dente, then drain and rinse under cold water so they stay firm.
- In a bowl, combine shredded chicken, cream cheese, a portion of the mozzarella, and basil pesto. Stir until everything comes together into a creamy, flavorful mixture that’s easy to spoon into the shells.
- Spread a layer of marinara sauce at the bottom of the baking dish. Fill each shell with a spoonful of the chicken-pesto mixture and arrange them neatly in the sauce.
- Pour the remaining marinara sauce over the stuffed shells and sprinkle with the rest of the mozzarella. Bake uncovered for 25–30 minutes until the cheese melts and bubbles beautifully.
Notes
- I sometimes add extra pesto for a stronger basil punch — it wakes up the flavor.
- I rinse the cooked shells so they stay firm and easy to stuff.
- I let the dish rest 5 minutes after baking — the filling sets and serving becomes easier.
- When I want to save time, I prep the entire dish the night before and bake it the next day.