Mini Peanut Butter Cup Cheesecakes Recipe | Sweet, Rich & Fun
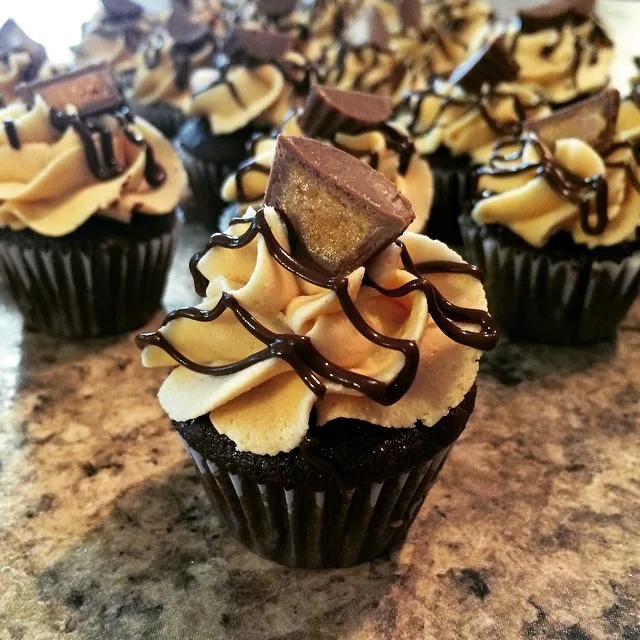
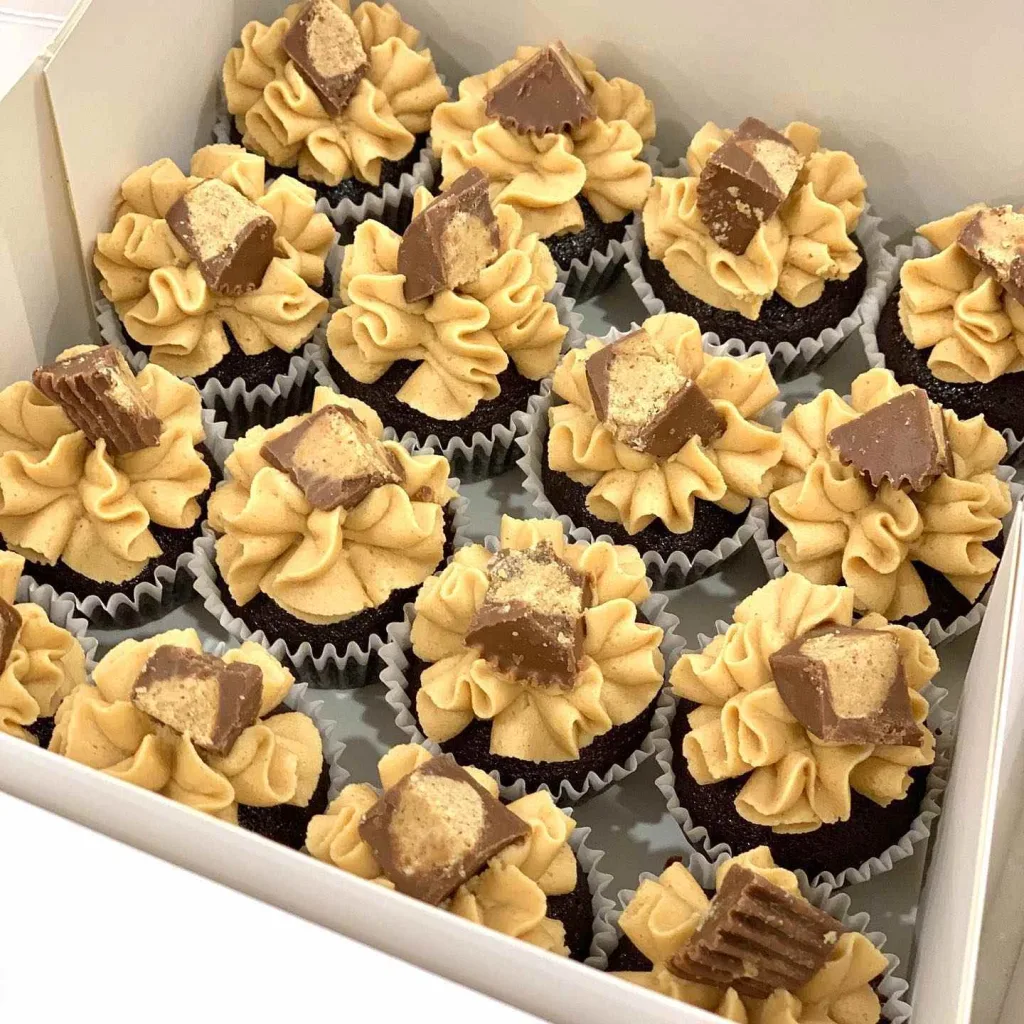
I remember the first time I made these mini peanut butter cup cheesecakes recipe—I was craving something both rich and fun, and these little treats hit the spot. After I popped them from the oven, chilled them, and took that first bite, I knew I’d be making them again and again.
They’re like a blend of your favorite peanut butter candy and a tangy cheesecake, baked into cute cupcake form. Best part: they’re portable and ideal for parties or treating yourself.
If you love trying new dessert twists, you can also enjoy Dark Chocolate Blackberry Cupcakes Recipe for another indulgent flavor experience. I’ll walk you through each step (and a few tricks I picked up) so your batch turns out perfect.

Ingredients
Here’s what you’ll need (makes about 18 cupcake-sized cheesecakes):
Graham cracker crust
- 1½ cups (165 g) chocolate graham cracker crumbs — gives that chocolatey base; you can also use crushed cookies if needed
- 2 tablespoons granulated sugar — helps bind the crust (not just for sweetness)
- 4 tablespoons unsalted butter, melted — holds the crust together
Cheesecake filling
- 16 oz (454 g) block-style cream cheese, at room temperature — provides the creamy, dense structure
- ½ cup (99 g) granulated sugar — sweetens the filling
- 2 large eggs, at room temperature — adds structure and richness
- ½ cup (135 g) creamy peanut butter — gives the signature peanut butter flavor
- 1 teaspoon vanilla extract — enhances overall flavor
Topping / candy coating
- ½ cup (85 g) semi-sweet chocolate chips — for the shell coating
- 3 tablespoons peanut butter — adds flavor to the chocolate layer
- 2 tablespoons coconut oil — thins and helps the shell harden like “magic shell”
Note: Several serving (this batch makes 18 mini cheesecakes)
Variations
If you want to switch things up, here are a few alternatives:
- Dairy-free / vegan: Use vegan cream cheese and a plant-based butter substitute. Be cautious with coconut oil or use a vegan-friendly magic shell substitute.
- Sugar-free / low sugar: Replace granulated sugar with a granular sweetener like erythritol or stevia blend (test small batch first).
- Nut butter swap: You could try almond butter or cashew butter instead of peanut butter, though texture and flavor may shift.
- Alternate crust: Use crushed Oreos or other cookies (e.g. chocolate wafers) instead of chocolate graham crackers.
- Different shell: Try a ganache instead of the magic shell—some readers have successfully used chocolate ganache.
Cooking Time
- Prep Time: 15 minutes
- Cook Time: 17 minutes
- Total Time: 32 minutes
Equipment you need
- Standard cupcake / muffin pan — to bake each mini cheesecake in its own cup
- Paper cupcake liners — for easy removal and clean presentation
- Mixing bowls (large and small) — to mix crust, filling, and topping
- Electric mixer (hand mixer or stand mixer) — to beat cream cheese smooth
- Measuring spoons & cups — for accurate ingredient portions
- Spoon or small ladle — to distribute filling and topping
- Microwave-safe bowl or double boiler setup — for melting chocolate shell
How to Make Mini Peanut Butter Cup Cheesecakes
Prepare the crust
Preheat your oven to 350 °F and line a standard cupcake pan with 18 liners. Mix together chocolate graham cracker crumbs, sugar, and melted butter until well blended. Then press about 1 tablespoon of crust into each liner using the bottom of a measuring cup to compact.
Make the cheesecake filling
In a large bowl, beat the cream cheese until smooth. Add sugar, and mix until fully incorporated, then beat in eggs one at a time. Finally, add peanut butter and vanilla, mixing just until smooth—be careful not to overmix or introduce too much air.
Bake & rest
Divide the filling among all 18 cups (about 3 tablespoons each). Tap the pan gently to settle. Bake for 17–19 minutes, until the centers only slightly jiggle. Turn off the oven, crack the door, and let the cheesecakes rest inside for 2–3 minutes before removing to cool further for 30 minutes.
Prepare and apply the candy coating
In a small bowl, combine chocolate chips, peanut butter, and coconut oil. Melt in the microwave in 30-second increments (stirring each time) until smooth, or melt over a double boiler. Spoon the melted mixture over each cooled cheesecake, tilting the pan so the coating spreads to the edges.
Chill before serving
Refrigerate the coated cheesecakes for at least 2 hours, up to 1 day, to allow the shell to firm up fully. Then they’re ready to enjoy!
Additional Tips for Making this Recipe Better
Here are tips I learned from doing this myself:
- Use room temperature ingredients—cold cream cheese or eggs can create lumps in your batter.
- Add ingredients in the order: cream cheese → sugar → eggs → peanut butter → vanilla. It helps avoid lumps.
- Don’t overmix — whipping too much air into the filling makes them sink more as they cool.
- After turning off the oven, crack the door and let cheesecakes rest inside for 2–3 minutes to avoid “shock” cooling.
- Wait until fully cooled before unwrapping liners or applying topping to prevent crumbling.
- Melt the chocolate shell mixture in shorter bursts (max 30 seconds) to avoid burning or gritty texture.
- If the shell seems too thick, readers have successfully substituted vegetable oil or shortening for coconut oil.
For another soft and airy dessert idea, try the Fluffy Japanese Cheesecake Cupcakes Recipe — its light texture pairs beautifully with tea or coffee.
How to Serve Mini Peanut Butter Cup Cheesecakes
These bite-sized cheesecakes look so cute when served individually. Place each one on a small dessert plate or tray, and consider garnishing with a mini peanut or a sprinkle of coarse sea salt. You can even press a mini peanut butter cup half on top of each for extra flair. Serve chilled, and for added visual appeal, you could drizzle a bit more melted chocolate around the plate or dust with cocoa powder.
Nutritional Information
Here’s a snapshot of what one mini cheesecake contains:
- Calories: 278 kcal
- Protein: 6 g
- Carbohydrates: 18 g
- Fat: 21 g
Make Ahead and Storage
Refrigerating
You can store these cheesecakes in a tightly sealed container in the fridge for up to 5 days.
Freezing
They freeze well for up to one month. After baking, let them cool fully, wrap them carefully, and place them in a freezer-safe container.
Reheating / thawing
Remove them from the freezer and let them sit on the counter for 2–3 hours until thawed before serving. Don’t microwave or heat them, as it may damage the texture or crack the chocolate shell.
Why You’ll Love This Recipe
Here are a few reasons I fell for these mini cheesecakes—and I bet you will too:
- They’re easy to prepare with everyday ingredients and straightforward steps.
- They’re portable and party-friendly, perfect for sharing or serving individually.
- They offer versatility—you can swap crusts, nut butters, or toppings with minimal fuss.
- The flavor combination is irresistible: tangy cheesecake meets peanut butter and chocolate.
- You can make in advance and store or freeze, making them a great option for entertaining.

Mini Peanut Butter Cup Cheesecakes Recipe
Ingredients
Method
- Preheat your oven to 350 °F and line a standard cupcake pan with 18 liners. Mix together chocolate graham cracker crumbs, sugar, and melted butter until well blended. Then press about 1 tablespoon of crust into each liner using the bottom of a measuring cup to compact.
- In a large bowl, beat the cream cheese until smooth. Add sugar, and mix until fully incorporated, then beat in eggs one at a time. Finally, add peanut butter and vanilla, mixing just until smooth—be careful not to overmix or introduce too much air.
- Divide the filling among all 18 cups (about 3 tablespoons each). Tap the pan gently to settle. Bake for 17–19 minutes, until the centers only slightly jiggle. Turn off the oven, crack the door, and let the cheesecakes rest inside for 2–3 minutes before removing to cool further for 30 minutes.
- In a small bowl, combine chocolate chips, peanut butter, and coconut oil. Melt in the microwave in 30-second increments (stirring each time) until smooth, or melt over a double boiler. Spoon the melted mixture over each cooled cheesecake, tilting the pan so the coating spreads to the edges.
- Refrigerate the coated cheesecakes for at least 2 hours, up to 1 day, to allow the shell to firm up fully. Then they’re ready to enjoy!
Notes
- Use room temperature ingredients—cold cream cheese or eggs can create lumps in your batter.
- Add ingredients in the order: cream cheese → sugar → eggs → peanut butter → vanilla. It helps avoid lumps.
- Don’t overmix — whipping too much air into the filling makes them sink more as they cool.
- After turning off the oven, crack the door and let cheesecakes rest inside for 2–3 minutes to avoid “shock” cooling.
- Wait until fully cooled before unwrapping liners or applying topping to prevent crumbling.
- Melt the chocolate shell mixture in shorter bursts (max 30 seconds) to avoid burning or gritty texture.
- If the shell seems too thick, readers have successfully substituted vegetable oil or shortening for coconut oil.